Growing roses can be a rewarding and beautiful experience, but it can also seem like a challenging task for beginners. The good news is that **propagating roses** doesn’t have to be a complicated process. In fact, there’s a simple, inexpensive, and innovative way to propagate rose cuttings with **toilet paper**. Yes, you heard it right—using just toilet paper and a few other basic materials, you can successfully propagate roses and grow new plants for your garden.
In this detailed guide, we’ll walk you through the entire process of propagating roses using toilet paper. Whether you’re an experienced gardener looking for an easy propagation method or a beginner eager to learn how to grow roses effortlessly, this technique will help you achieve beautiful blooms without the hassle.
### Why Propagate Roses?
Before diving into the step-by-step process, let’s take a quick look at why propagating roses is such a great idea. Whether you’re looking to increase the number of plants in your garden, share the beauty of roses with friends, or preserve a beloved variety, propagating roses is an ideal solution.
1. **Cost-Effective**: Instead of buying new rose plants every year, you can propagate them and save money.
2. **Customization**: Propagation allows you to create more of your favorite rose varieties, giving you more control over your garden’s aesthetic.
3. **Satisfaction**: There’s something incredibly satisfying about taking a cutting from a rose and nurturing it into a full-grown plant. Plus, it’s a great way to share plants with others
Now, let’s explore how you can easily propagate roses using **toilet paper**, an unusual yet surprisingly effective method.
### Materials Needed for Propagating Roses with Toilet Paper
To propagate roses with toilet paper, you don’t need any fancy equipment or complex tools. Here’s a list of the simple materials required:
1. **Fresh Rose Cuttings**: Healthy stems from a mature rose plant, preferably from a flower that’s just finished blooming.
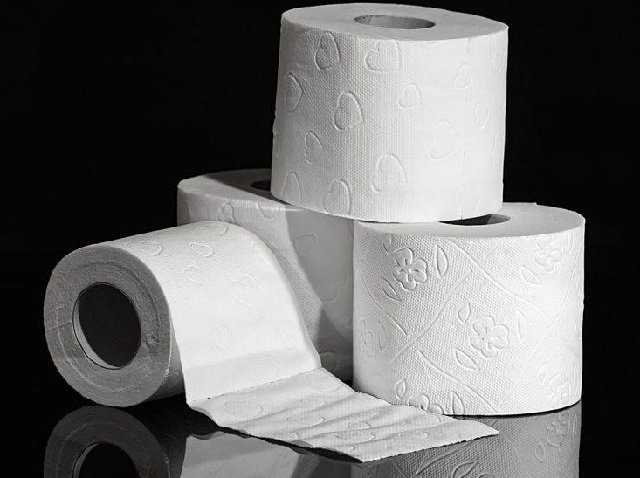
2. **Plain White Toilet Paper**: It’s important to use plain, white toilet paper without any dyes, fragrances, or chemicals.
3. **Rooting Hormone (Optional)**: While not strictly necessary, using rooting hormone can encourage quicker and stronger root growth.
4. **Small Pots or Containers**: Choose small pots or containers that are suitable for starting new plants. They should have drainage holes.
5. **Moistened Potting Mix**: A well-draining potting mix is essential for healthy root development.
Now that you have all the materials ready, let’s get started with the step-by-step process of propagating roses using toilet paper.
### Step-by-Step Guide to Propagate Roses with Toilet Paper

#### Step 1: Gather Your Materials
Before you begin, make sure you have everything you need. You’ll need fresh rose cuttings, toilet paper, and a few simple gardening tools. Having everything prepared ahead of time will make the process smoother and more efficient.
#### Step 2: Select and Prepare the Rose Cuttings
Choose a healthy, **semi-hardwood stem** from a mature rose plant. The cutting should be approximately **6-8 inches** in length, taken from a stem that has just bloomed. Select a cutting that has at least a few healthy leaves and is free from any diseases or pests.
– **Remove Lower Leaves**: Once you’ve cut the stem, strip off the lower leaves, leaving just a few leaves at the top. This will help prevent rot when the cutting is wrapped in toilet paper.
– **Trim the Cutting**: Make a **clean cut** just below a leaf node (the point where leaves are attached to the stem). This ensures that the cutting has a good point to root from.
#### Step 3: Optional Use of Rooting Hormone
While not absolutely necessary, dipping the cut end of the rose cutting in **rooting hormone** can encourage faster and stronger root growth. Rooting hormone contains **auxins**, which are natural plant hormones that stimulate root development.
– **Dip the Cutting**: After preparing the cutting, dip the lower end (the part that will go into the soil) into the rooting hormone. Tap off any excess powder before proceeding to the next step.
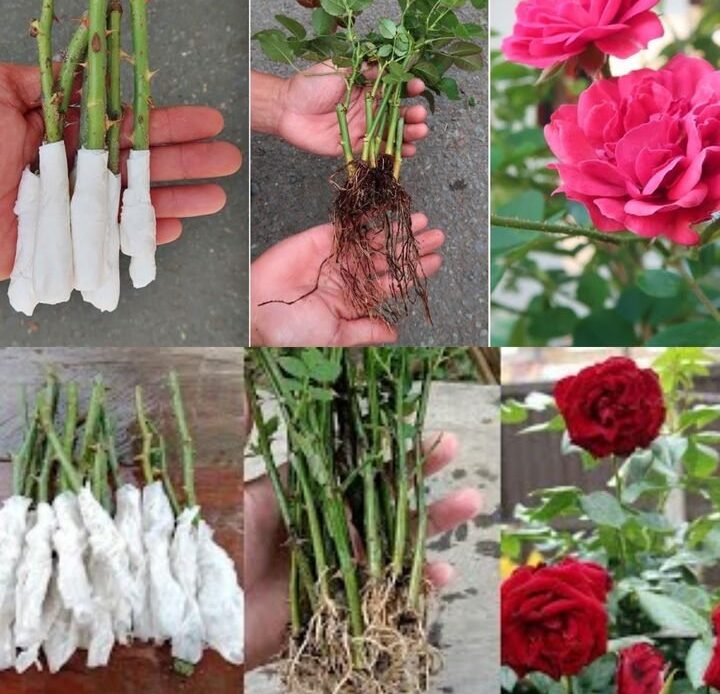
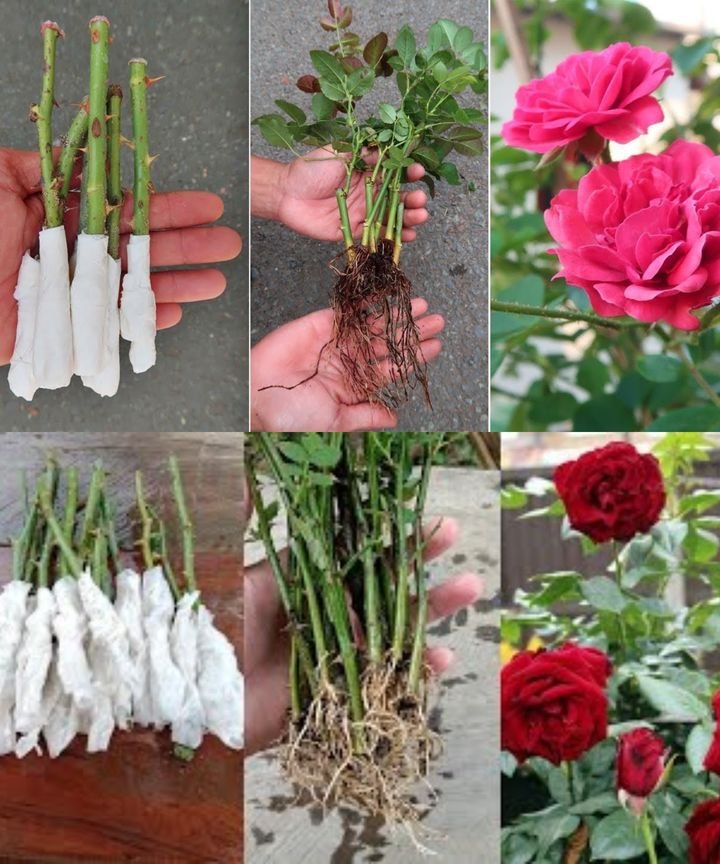
#### Step 4: Wrap the Cuttings in Toilet Paper
The key to this method is using **toilet paper** to wrap the cutting, which helps keep the cutting moist and provides a nurturing environment for the development of roots.
– **Moisten the Toilet Paper**: Dampen a piece of toilet paper with water. It should be wet but not dripping. You want enough moisture to create a humid environment around the cutting without making the paper too soggy.
– **Wrap the Cutting**: Wrap the cut end of the rose cutting tightly in the damp toilet paper. Make sure the toilet paper covers the entire cut area where the roots will grow.
– **Secure the Wrap**: Use a **twist tie**, **rubber band**, or some string to secure the ends of the toilet paper, ensuring that the cutting is held in place.
#### Step 5: Plant the Wrapped Cuttings in Pots
Now that the cutting is wrapped in the moist toilet paper, it’s time to plant it in a small pot with a well-draining potting mix.
– **Prepare the Potting Mix**: Fill a small pot with moist, well-draining potting mix. Ensure that the mix is damp but not waterlogged.
– **Plant the Cutting**: Gently place the wrapped cutting into the pot, with the wrapped end buried in the soil. Press the soil down lightly around the cutting to secure it in place.
– **Water the Pot**: Lightly water the pot after planting the cutting to ensure that the soil is evenly moist. Keep the soil damp but not too wet.
#### Step 6: Create a Humid Environment
To encourage root growth, it’s important to maintain a high level of humidity around the cutting. You can do this by covering the pot with a **clear plastic bag** or **humidity dome**, which helps trap moisture and create a mini greenhouse effect.
– **Use a Clear Plastic Bag**: Place a clear plastic bag over the pot, ensuring that the bag does not touch the cutting. You can use stakes or a small frame to support the bag.
– **Ensure Ventilation**: Make sure the plastic bag or dome has some small holes for air circulation to prevent mold and mildew buildup.
#### Step 7: Monitor and Care for the Cutting
During the rooting process, it’s important to keep the cutting in a warm location with indirect sunlight. Too much direct sunlight can dry out the cutting, while too little sunlight can hinder root development.
– **Watering**: Keep the soil consistently moist but avoid overwatering. Check the soil moisture regularly and water the cutting when the soil feels slightly dry.
– **Check for Root Development**: After a few weeks, gently tug on the cutting to see if there is any resistance. If you feel resistance, it’s a sign that roots have started to form.
#### Step 8: Transplant the Cutting Once Roots Have Developed
After several weeks, the cutting will develop roots, and you can transplant it into a larger pot or directly into your garden.
– **Transplant to Larger Pots**: Once the cutting has formed strong roots and new growth, it’s time to move it to a larger pot with fresh soil.
– **Garden Planting**: If you plan to plant the rose in the garden, choose a sunny spot with well-drained soil. Make sure the ground is loose and ready to accommodate the new plant.
#### Step 9: Provide Ongoing Care for Your New Rose Plant
Once your new rose plant has been transplanted, it’s important to continue caring for it to ensure healthy growth.
– **Watering**: Keep the soil consistently moist, especially during the first few weeks after transplanting.
– **Sunlight**: Provide your rose plant with plenty of sunlight. Roses typically thrive in full sun, so ensure that the plant receives at least 6-8 hours of sunlight daily.
– **Fertilization**: Use a balanced rose fertilizer every few weeks to promote strong growth and vibrant blooms.
– **Pest Control**: Watch for common rose pests like aphids, caterpillars, and spider mites. Use natural remedies or insecticidal soap to control infestations.
### Tips for Success When Propagating Roses with Toilet Paper
While propagating roses using toilet paper is a simple and effective method, there are a few tips that can help you achieve the best results:
1. **Use Fresh, Healthy Cuttings**: Choose healthy, semi-hardwood cuttings for the best chances of success. Avoid using cuttings from plants that are sick or infected.
2. **Moisture Control**: Keep the toilet paper damp but not soaking wet. Over-wetting the paper can cause rot.
3. **Indirect Sunlight**: Avoid placing the cuttings in direct sunlight, as this can dry them out too quickly. Provide them with bright, indirect light.
4. **Be Patient**: Rooting can take several weeks, so be patient and give your cutting time to grow roots.
5. **Monitor Temperature**: Ensure that the cuttings are kept in a warm area, ideally between 65-75°F (18-24°C), for optimal root development.
### Conclusion: Growing Roses Made Easy
With just a few simple materials, you can propagate beautiful rose plants right in the comfort of your home. The method of using **toilet paper** to propagate **roses** is not only easy and inexpensive but also an effective way to grow multiple roses from a single plant. Whether you’re a beginner or an experienced gardener, this method allows you to create new rose plants that will brighten up your garden with minimal effort.
By following this straightforward guide and keeping your new rose cuttings in the right environment, you’ll be amazed at how quickly they grow into healthy, blooming rose plants. So, what are you waiting for? Grab your **rose cuttings**, **toilet paper**, and get started on your rose-growing journey today 🌹🧻✨