Watering your garden efficiently can be a challenge, especially in dry seasons when every drop counts. Instead of investing in expensive irrigation systems, why not build a simple, eco-friendly, and cost-effective solution using plastic bottles? This DIY rotating irrigation system is not only easy to make but also helps recycle waste materials. In this guide, we’ll walk you through the steps to create an automatic watering system that can keep your garden hydrated—all for as little as 10 cents
## **Why Use a Rotating Irrigation System?**
A rotating irrigation system is an excellent way to distribute water evenly across your garden. Unlike traditional watering methods that may overwater some areas while leaving others dry, this system ensures uniform moisture distribution. Here are some key benefits:
– **Low-cost and environmentally friendly:** Made from recycled plastic bottles, this system reduces waste and saves money.
– **Even water distribution:** Rotating motion allows water to spread across a larger area.
– **Easy to assemble:** Requires only a few household materials and minimal effort.
– **Self-sustaining:** Once set up, the system functions automatically with minimal maintenance.
## **Materials Needed**
Before you start, gather the following materials:
– **Two large plastic bottles** (1.5 to 2 liters each)
– **A bamboo skewer or metal rod** (for rotation)
– **Thin tubing or plastic straws** (to direct water flow)
– **String or thin wire** (to secure components)
– **Scissors or a craft knife**
– **An awl or a nail** (to create water holes)
– **Hot glue or waterproof adhesive**
## **Step-by-Step Guide to Building Your Irrigation System**
### **Step 1: Prepare the Plastic Bottles**
Begin by thoroughly washing both plastic bottles to remove any residue. Allow them to dry completely before proceeding.
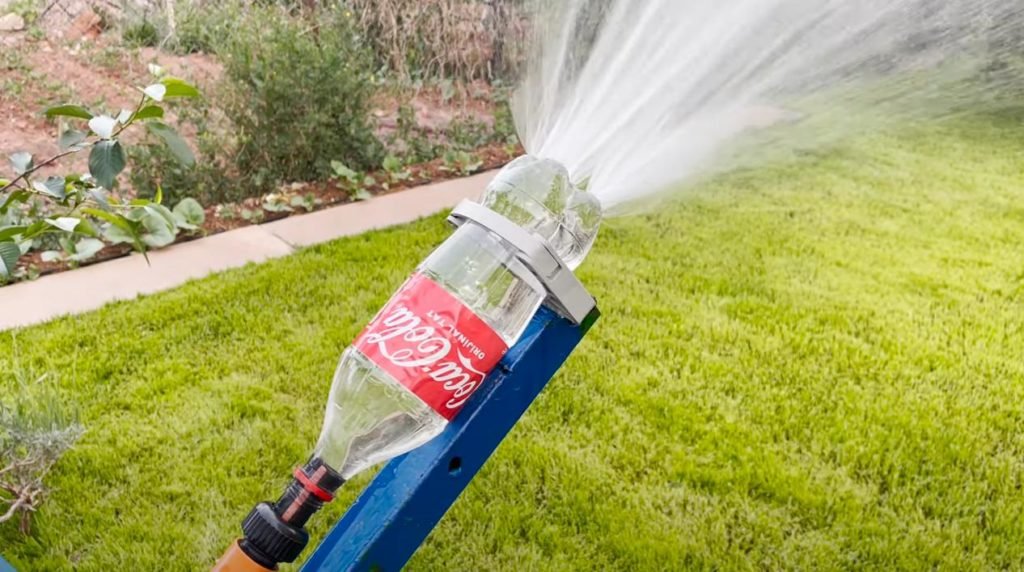
– **Bottle 1 (Water Reservoir):** Cut off the top portion to create an open container that will hold water.
– **Bottle 2 (Water Wheels):** Cut the bottom off, then slice the remaining part lengthwise to create two curved halves. These will serve as the rotating water wheels.
### **Step 2: Create the Water Wheels**
To ensure a smooth rotation, attach plastic straws or thin tubing inside the curved bottle pieces. These will act as water channels, guiding the water flow when the wheels spin. Secure them with waterproof adhesive to prevent leaks.
### **Step 3: Assemble the Rotating System**
Now, it’s time to assemble the moving parts of the irrigation system.
– Insert a **bamboo skewer or metal rod** through the center of the water reservoir bottle. This will serve as the rotation axis.
– Attach the **water wheels** to the rod on either side. Ensure they are well-balanced to rotate smoothly when water flows through.
– Secure the wheels with **string or thin wire** to keep them in place while allowing free movement.
### **Step 4: Create Water Inlet Holes**
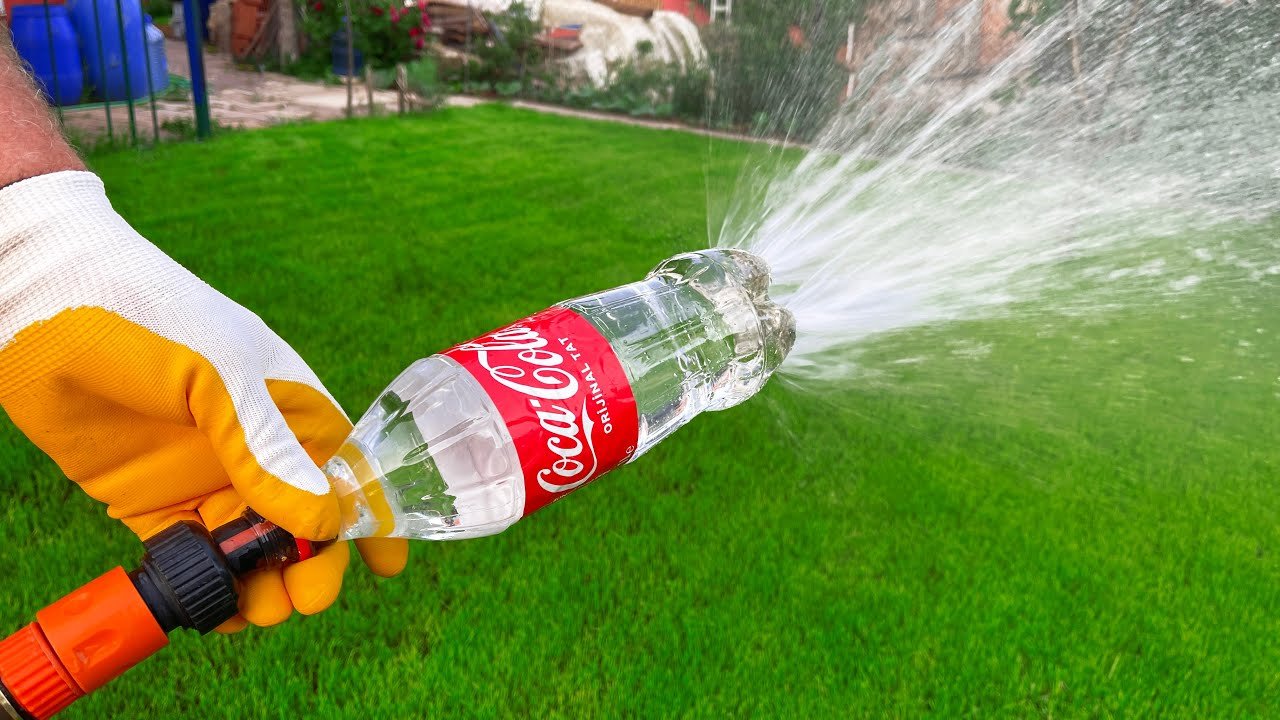
Using an awl or a heated nail, carefully punch small holes near the bottom of the water reservoir. These holes should be evenly spaced to allow a steady water flow. The force of the dripping water will rotate the wheels, creating a natural sprinkling effect.
### **Step 5: Set Up the System in Your Garden**
Choose a suitable location in your garden to install the irrigation system. Ideally, it should be elevated slightly so that gravity can assist in water flow.
– Place the **water reservoir bottle on a raised platform** such as a brick or wooden stand.
– Ensure the **water wheels are positioned over the area you want to irrigate**.
### **Step 6: Add Water and Observe**
Fill the water reservoir with water and observe how it flows through the holes. The water should drip onto the wheels, causing them to spin and distribute water evenly.
If needed, make adjustments to:
– **The size and number of holes** to control water flow.
– **The balance of the wheels** to ensure smooth rotation.
– **The positioning of the system** to maximize coverage.
## **Maintenance Tips for Long-Term Use**
Once your rotating irrigation system is up and running, follow these simple maintenance steps to keep it functioning effectively:
1. **Regularly check for clogging:** Dirt or debris may block the holes, reducing water flow. Clean them as needed.
2. **Adjust hole sizes if necessary:** If water is flowing too fast or too slow, modify the holes to regulate the flow rate.
3. **Ensure the system remains balanced:** Uneven rotation can affect water distribution. Reposition components if required.
4. **Replace worn-out parts:** If the plastic straws or tubing wear out over time, replace them with new ones.
## **Why This System Works So Well**
This DIY irrigation system is a perfect example of how **simple innovations can make gardening more efficient and sustainable**. Unlike expensive commercial irrigation systems, this solution uses readily available materials while still delivering impressive results.
Additionally, **the rotating motion helps aerate the soil** while distributing water, preventing root rot and overwatering. It also reduces water waste, ensuring your garden stays healthy while conserving resources.
## **Expanding the System for Larger Gardens**
If you have a larger garden, consider scaling up this system by:
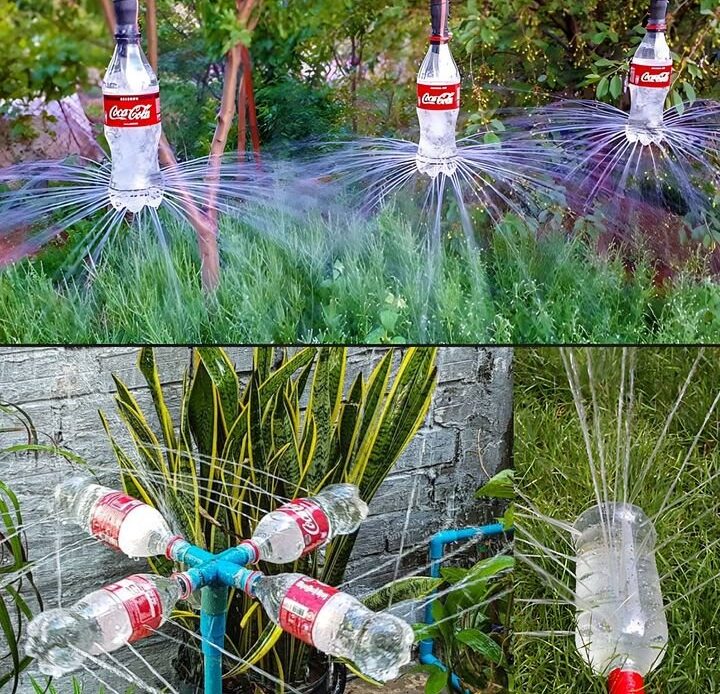
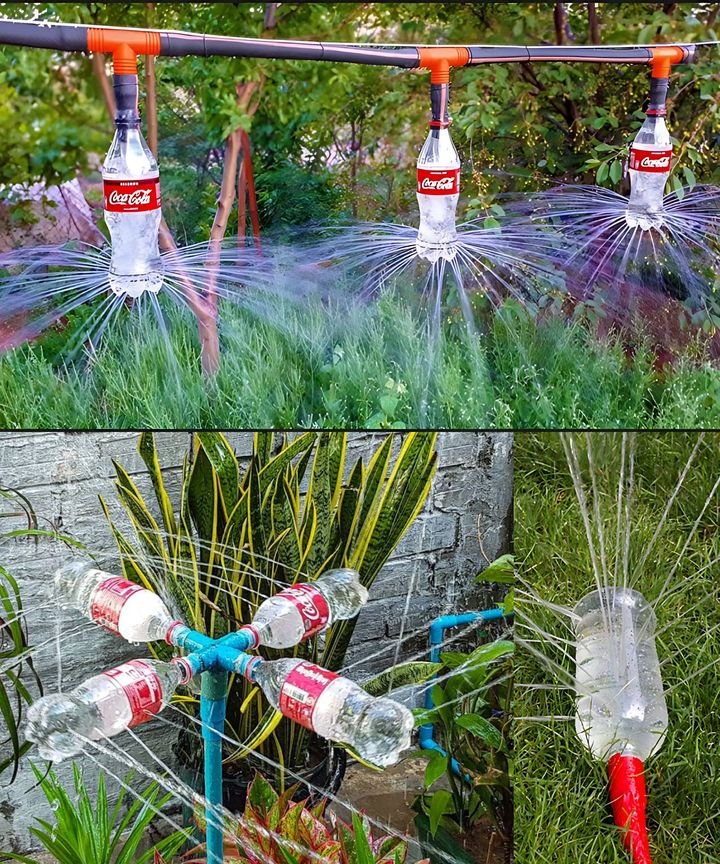
– Using **multiple bottles** to create interconnected irrigation points.
– Extending the **water wheels** with additional tubing for wider coverage.
– Connecting a **rainwater collection system** to the reservoir for an even more sustainable setup.
## **Final Thoughts**
Building a rotating irrigation system using plastic bottles is an **easy, affordable, and environmentally friendly** way to keep your garden hydrated. With just a few materials and a little creativity, you can create an **effective self-watering system** that saves water, time, and money.
So, why not give it a try? Not only will your plants thrive, but you’ll also be contributing to **waste reduction and sustainable gardening**. Happy gardening