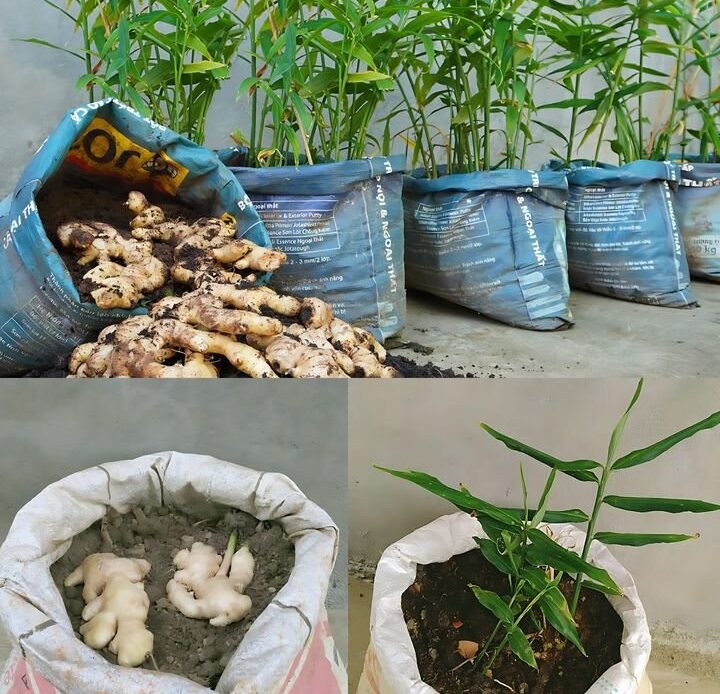
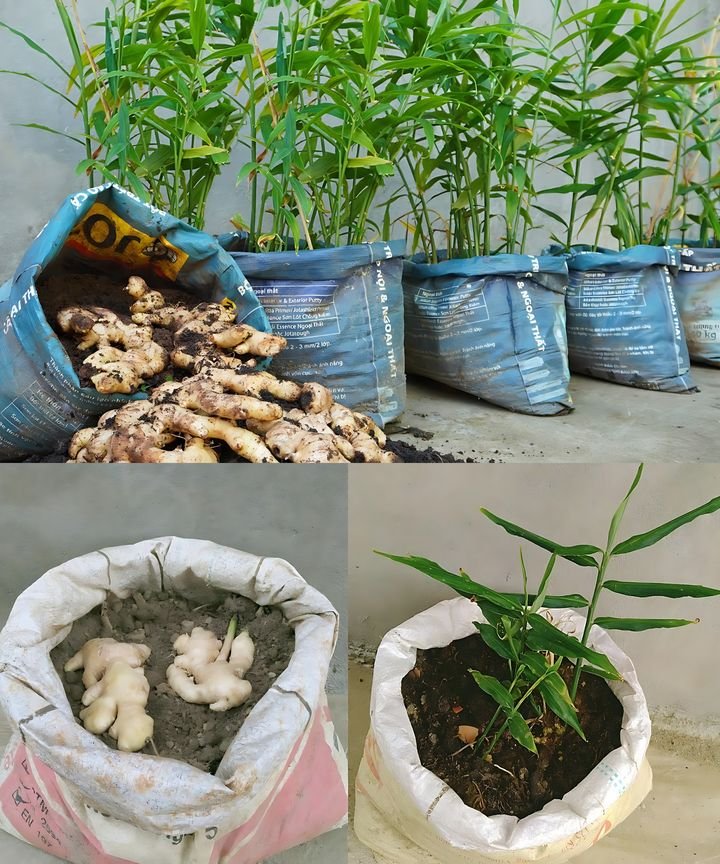
Growing ginger at home is an excellent way to enjoy fresh, organic produce while making the most of available resources. By recycling old bags, you can create an eco-friendly and space-saving method for cultivating ginger with minimal effort. This guide provides step-by-step instructions to help you successfully grow ginger at home using old bags, ensuring a plentiful harvest.
### **Why Grow Ginger in Old Bags?**
Utilizing old bags for ginger cultivation comes with numerous benefits:
– **Eco-Friendly Gardening:** Repurposing old bags reduces waste and promotes sustainability.
– **Space-Saving Solution:** Perfect for small gardens, balconies, or indoor spaces.
– **Enhanced Drainage:** Bags allow for better water control, reducing the risk of root rot.
– **Easy Mobility:** Move the bags to optimize sunlight exposure and protect plants from harsh weather conditions.
– **Cost-Effective:** No need for expensive pots or garden beds.
### **Materials Needed**
Before starting, gather the necessary materials to set up your ginger-growing system:
– Old bags (e.g., reusable shopping bags, burlap sacks, or rice sacks)
– Healthy ginger rhizomes (with visible growth buds)
– High-quality potting soil
– Compost or organic matter (optional, for nutrient enrichment)
– Watering can or spray bottle
### **Step-by-Step Guide to Growing Ginger in Old Bags**
#### **Step 1: Preparing the Ginger Rhizomes**
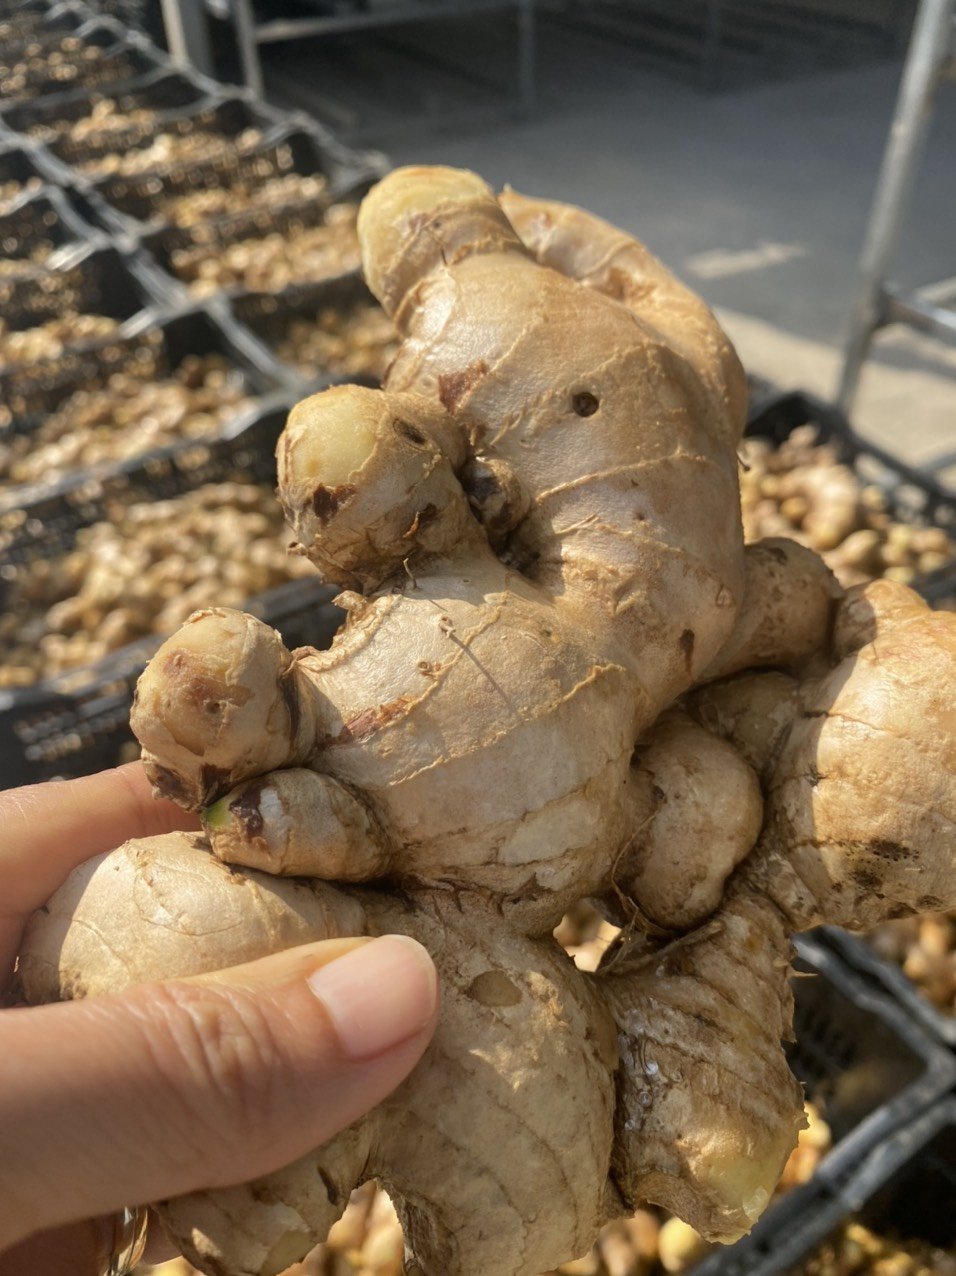
1. **Select Healthy Rhizomes:** Choose fresh, plump ginger rhizomes with visible growth buds (also known as eyes).
2. **Cut into Sections:** If using large rhizomes, cut them into 1-2 inch pieces, ensuring each piece has at least one or two growth buds.
3. **Allow to Cure:** Let the cut pieces dry for one to two days in a cool, shaded area. This helps prevent rotting when planted.
#### **Step 2: Preparing the Bags**
1. **Choose the Right Bags:** Use sturdy, breathable bags such as burlap sacks, woven shopping bags, or old grow bags.
2. **Ensure Proper Drainage:** If the bags lack drainage holes, poke small holes in the bottom and lower sides to prevent water accumulation.
3. **Fill with Soil:** Use a nutrient-rich potting soil mixed with compost for optimal growth. Fill the bag about halfway to allow room for hilling as the ginger grows.
#### **Step 3: Planting the Ginger**
1. **Position the Bags:** Place the bags in an area that receives indirect sunlight. Avoid direct exposure to strong sunlight as young ginger plants prefer warm but shaded conditions.
2. **Plant the Rhizomes:** Bury the ginger pieces 2-4 inches deep with the growth buds facing upward.
3. **Space the Rhizomes:** Maintain a few inches of spacing between each piece to allow adequate room for growth.
#### **Step 4: Watering and Maintenance**
1. **Watering:** Keep the soil consistently moist but not soggy. Water when the top inch of soil feels dry.
2. **Adding More Soil:** As the ginger grows, add more soil to the bag to cover the developing rhizomes. This practice, known as hilling, encourages higher yields.
3. **Weed Control:** Regularly check for weeds and remove them promptly to avoid competition for nutrients.
4. **Temperature Considerations:** Ginger thrives in warm temperatures (75-85°F). If temperatures drop, consider moving the bags indoors.
#### **Step 5: Fertilization and Growth Support**
1. **Use Organic Fertilizer:** Apply a balanced fertilizer or compost every few weeks to promote steady growth.
2. **Monitor for Pests:** Keep an eye out for pests like aphids or spider mites. Use natural pest control methods, such as neem oil or insecticidal soap, if needed.
3. **Maintain Humidity:** Mist the soil occasionally to maintain proper moisture levels, especially in dry climates.
#### **Step 6: Harvesting the Ginger**
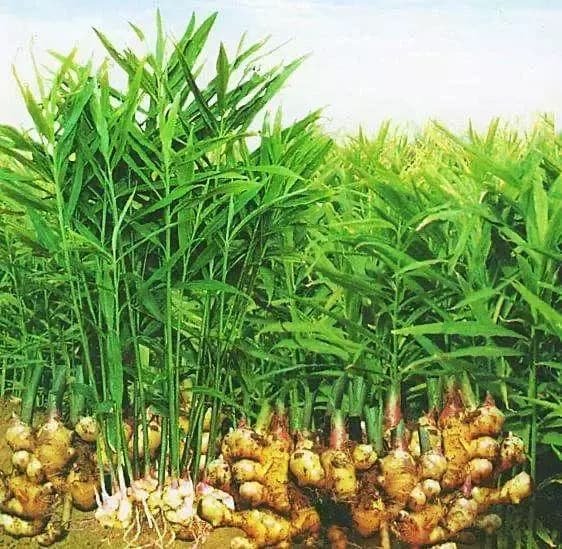
1. **Wait for Maturity:** Ginger typically takes 8-10 months to mature fully.
2. **Check for Readiness:** The leaves will begin to yellow and dry out, indicating that the ginger is ready for harvest.
3. **Harvest Carefully:** Gently dig into the soil and pull out the ginger rhizomes. Avoid damaging them during extraction.
4. **Use Fresh or Store:** Freshly harvested ginger can be used immediately or stored by drying or refrigerating for later use.
### **Tips for Success**
– **Best Planting Time:** Start planting in early spring for optimal growth.
– **Drainage is Key:** Ensure good water drainage to prevent root rot.
– **Protect from Cold:** In colder climates, move bags indoors during winter months.
– **Regular Feeding:** Feed ginger plants with compost tea or organic fertilizer for better yield.
– **Rotate the Bags:** Rotate or reposition the bags to ensure even growth and sunlight distribution.
### **Conclusion**
Growing ginger in old bags is an efficient and sustainable way to produce fresh ginger at home. This method not only maximizes space and reduces waste but also provides a simple, low-maintenance way to enjoy a bountiful harvest. Whether you have a small garden, a balcony, or an indoor space, using old bags to grow ginger is an excellent option for home gardeners. By following these easy steps, you can cultivate your own organic ginger with minimal effort and enjoy its many culinary and medicinal benefits throughout the year.