Orchids, with their stunning beauty, are highly prized flowers. Not only can you enjoy their blooms annually, but you also have the fascinating option to propagate them and watch the growth of the smaller offshoots.
Various effective techniques exist for orchid propagation, enabling the continuous reproduction of your cherished plants.
One common method is propagation through cuttings or keiki. Let’s delve into how this is done.
Propagating Orchids Using Keiki A keiki is a young plant that emerges on an orchid’s stem, presenting a prime opportunity for propagation. This new plant is a clone of the parent, resulting from asexual reproduction. Keikis may occur naturally, but you can also encourage their development. Here’s how:
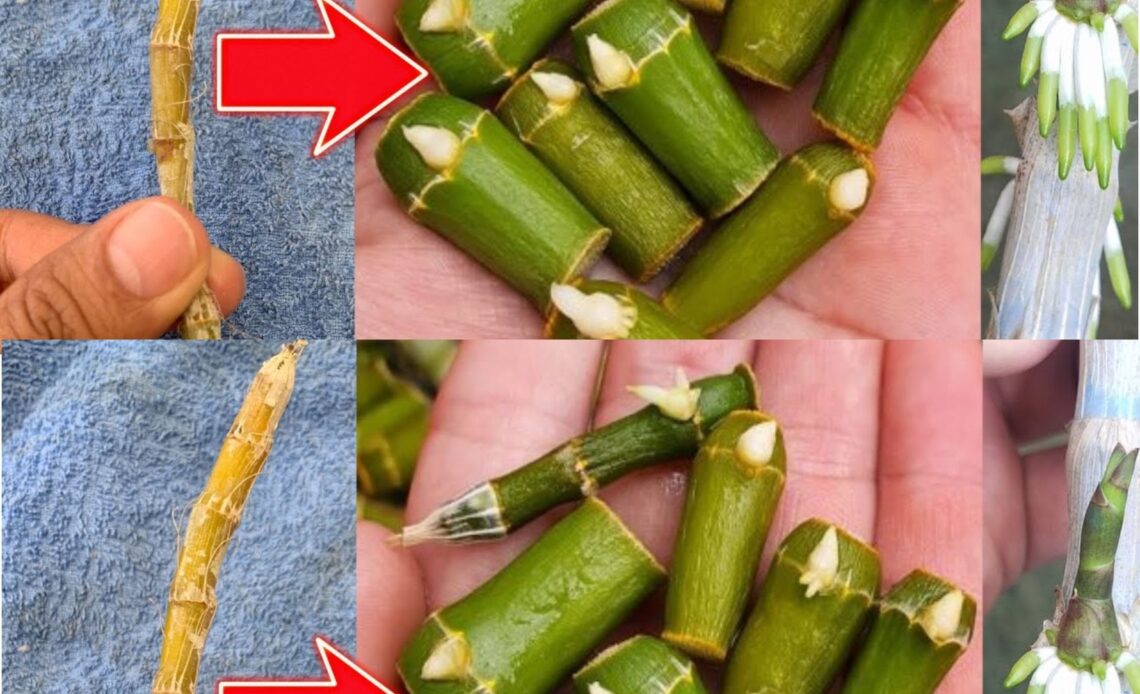
Encouraging Keiki Growth on Orchids Post-flowering, trim the orchid’s flower stem slightly above the base. Carefully expose the “node” area to air by gently peeling it. This exposure could stimulate a keiki’s emergence.
Planting a Keiki Once a keiki’s roots are about 4-5 centimeters long, it’s ready for replanting. Place it in the same container as the parent orchid to ensure identical growth conditions and moisture levels.
Detach the keiki about 3-5 centimeters from the flower stem and plant it alongside the mother plant. Ensure the roots face downward and are lightly covered with soil. Also, bury the trimmed flower stem, anchoring it in the soil.
After maturity, you can carefully separate the keiki from the parent plant.
Orchid Propagation via Cuttings For stem cutting propagation, prepare a waterproof tray about 8 centimeters deep. Fill it with moistened sand or Sphagnum moss.
Slice a 30-centimeter stem from the parent orchid using a sharp knife. Cut it into several 3-inch pieces, each with a dormant bud. Lay moistened moss or sand in the tray and place the cuttings on it. Cover with plastic and keep in a 15°C environment away from direct light. After some weeks, raise the temperature to 24-30 degrees, ensuring the tray remains moist (but not overly wet). When shoots and roots appear, cut the cuttings again. Prepare small pots with a mix of bark, volcanic soil, and moistened Sphagnum moss. Plant the orchids with the shoots facing upwards. Position the newly propagated orchids in a bright, indirect sunlight area. Water regularly, avoiding excess to prevent rot. Maintain a humid environment for the plants, keeping them away from direct heat sources.
Through these methods, you can successfully propagate orchids and enjoy an ever-expanding collection of these exquisite plants.
Share Article:
