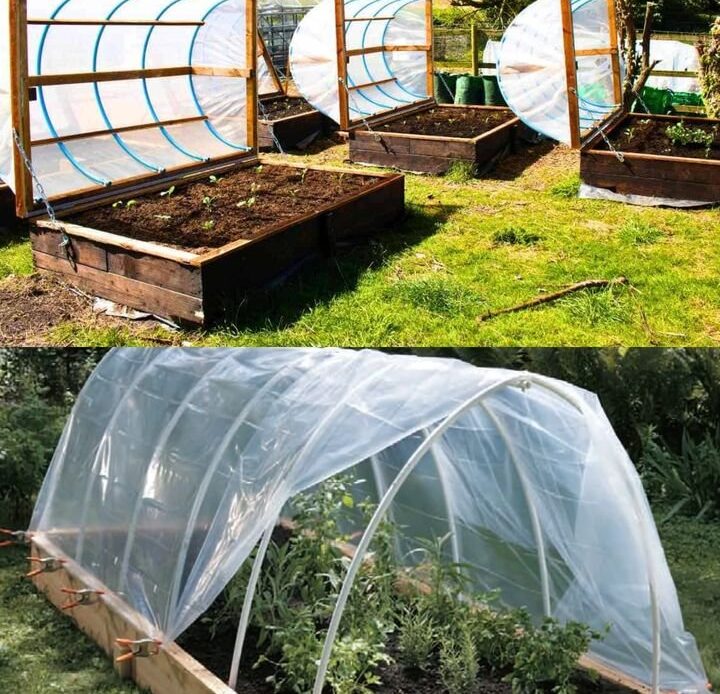
A hinged hoophouse is an excellent addition to any raised bed garden, offering protection from harsh weather, extending the growing season, and keeping pests at bay. Whether you’re looking to grow crops earlier in the spring or later into the fall, a hoophouse creates a controlled environment that benefits plants. This guide will walk you through the step-by-step process of constructing a hinged hoophouse for your raised bed garden, ensuring durability, functionality, and ease of use.
## **Benefits of a Hinged Hoophouse**

Before diving into the construction process, it’s essential to understand why a hinged hoophouse is a valuable investment for your garden.
1. **Season Extension** – Protects plants from frost, allowing you to start growing earlier in spring and continue harvesting later into fall.
2. **Weather Protection** – Shields plants from strong winds, heavy rain, and even snow, preventing damage.
3. **Pest Control** – Acts as a barrier against common garden pests such as insects, rabbits, and birds.
4. **Temperature Regulation** – Traps heat, creating a warmer environment that helps heat-loving plants thrive.
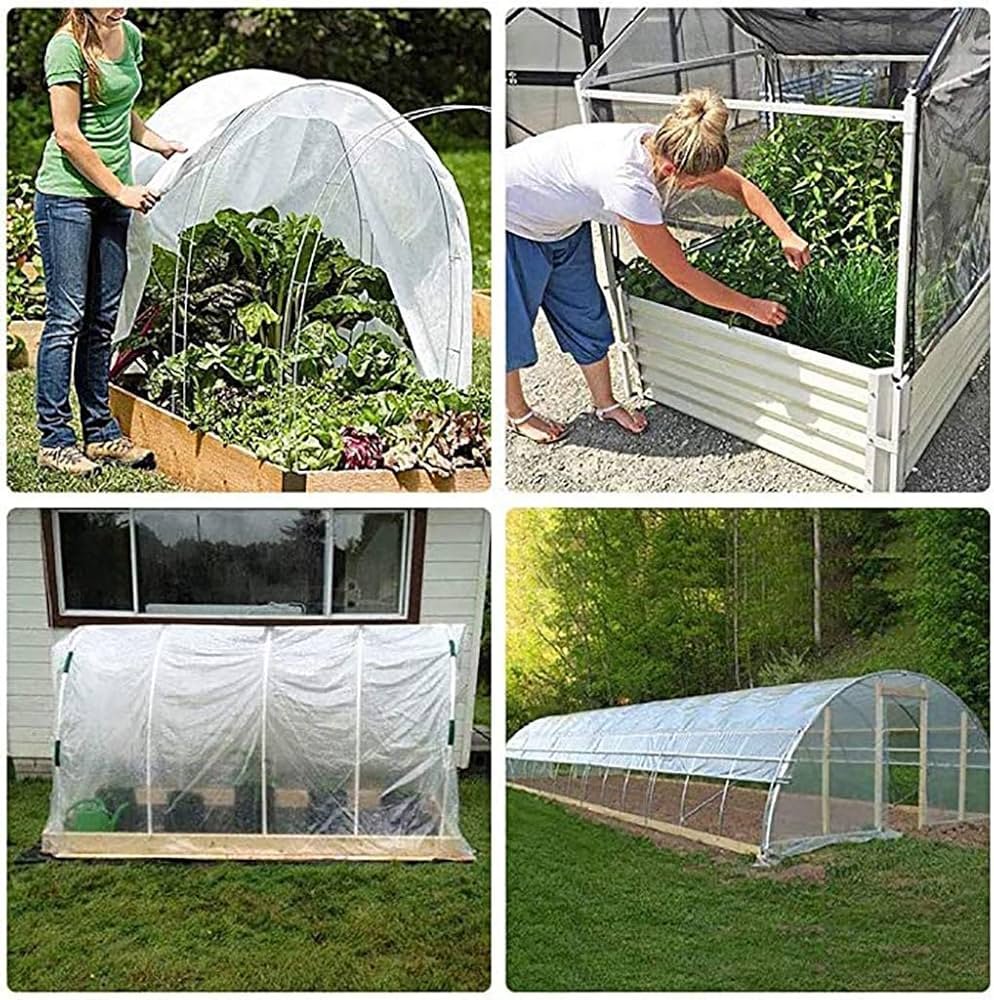
5. **Convenience** – The hinged design allows for easy access to plants without removing the entire cover.
Now that you understand the benefits, let’s get started with the materials and steps needed to build your own hinged hoophouse.
## **Materials Needed**
To construct a durable and functional hinged hoophouse, gather the following materials:
– **Raised bed garden frame** (existing or newly built)
– **PVC pipes** (¾-inch or 1-inch diameter) for creating hoops
– **Hinges** (preferably heavy-duty, rust-resistant)
– **Plastic sheeting** (UV-resistant greenhouse plastic)
– **Pipe clamps** (to secure PVC pipes to the bed frame)
– **Screws and a drill** (for attaching the hinges and clamps)
– **UV-resistant zip ties or clips** (for securing the plastic sheeting)
– **Wooden frame (optional)** for additional support
– **Scissors or a utility knife** (for cutting plastic sheeting)
– **Measuring tape and marker**
Once you have all the necessary materials, you’re ready to move on to the construction process.
## **Step-by-Step Guide to Building Your Hinged Hoophouse**
### **Step 1: Prepare Your Raised Bed**
If you already have a raised bed garden, ensure it is sturdy and in a suitable location with ample sunlight. If constructing a new raised bed, use weather-resistant materials such as cedar or treated lumber. The size of your raised bed will determine the dimensions of the hoophouse.
### **Step 2: Measure and Cut PVC Pipes**
Using a measuring tape, determine the length and width of your raised bed. Based on these measurements, cut your PVC pipes to the appropriate size, ensuring they will create uniform hoops over the bed. The number of pipes depends on the size of your bed, but generally, spacing them every **2-3 feet** provides adequate support.
### **Step 3: Attach Hinges to One Side of the Raised Bed**
Choose one long side of the raised bed to serve as the fixed base for the hoophouse. Attach the **hinges** along this side using screws and a drill. Space them evenly to provide stability when opening and closing the hoophouse. Hinges will allow you to lift the entire structure easily for planting, watering, and harvesting.
### **Step 4: Secure PVC Pipes to the Hinged Side**
Using pipe clamps and screws, attach one end of each PVC pipe to the hinged side of the raised bed. Ensure the pipes are evenly spaced and firmly secured. This will allow the frame to pivot smoothly when opening the hoophouse.
### **Step 5: Form the Hoophouse Structure**
Bend each PVC pipe to create an arch and secure the other end to the opposite side of the raised bed using additional pipe clamps. Ensure that the structure is stable and symmetrical. If needed, install a **horizontal PVC pipe** across the top for added support.
### **Step 6: Cover with Plastic Sheeting**
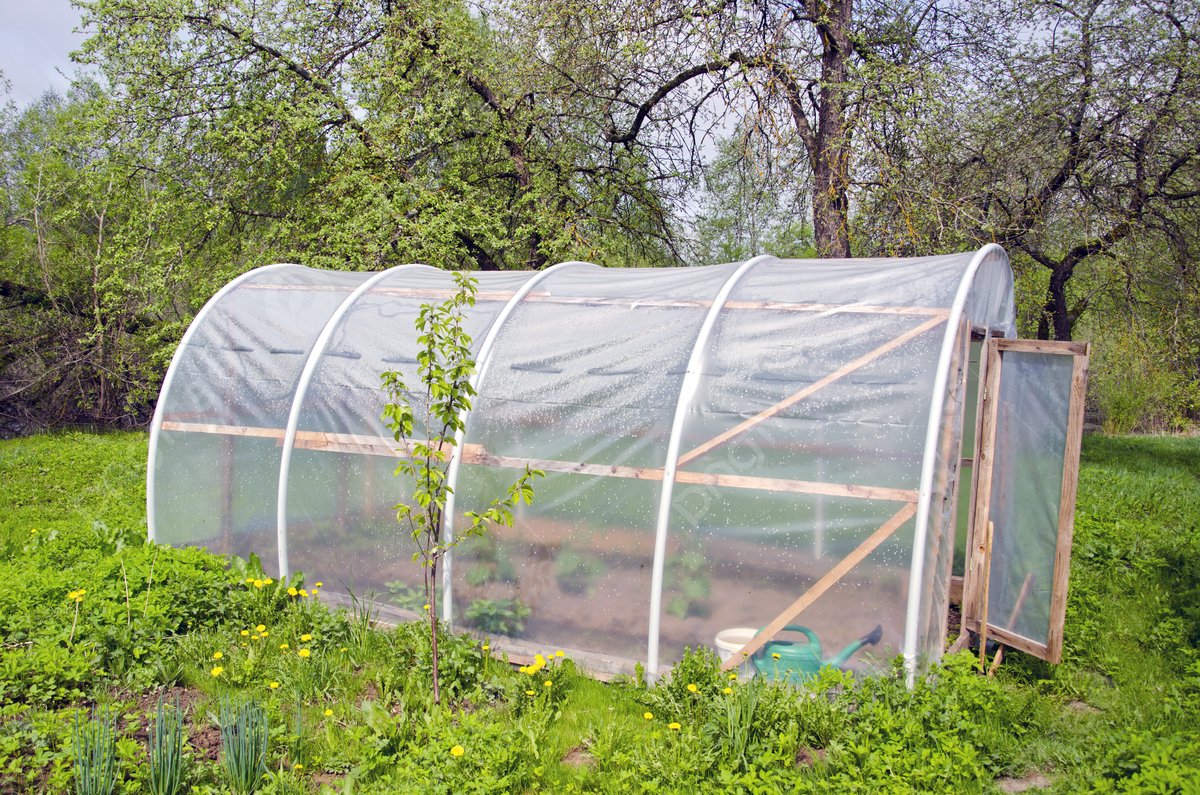
Drape **UV-resistant plastic sheeting** over the PVC hoop structure, making sure there is enough material to cover both ends of the bed. Secure the plastic to the pipes using **zip ties, clips, or clamps**. Pull the plastic taut to prevent sagging, which can trap water or snow.
### **Step 7: Secure the Plastic Sheeting**
To keep the plastic in place during strong winds or storms, staple or clamp the excess plastic to the wooden frame of the raised bed. Alternatively, create a **removable fastening system** using bungee cords or Velcro straps for easier access.
### **Step 8: Test the Hinged Mechanism**
Gently lift the hinged side of the hoophouse to ensure smooth movement. Adjust the hinges if necessary, making sure the structure remains stable when opened or closed. This step ensures ease of use throughout the growing season.
### **Step 9: Add Ventilation Options**
To regulate temperature and humidity inside the hoophouse, consider adding **ventilation options**:
– Roll up the sides of the plastic sheeting during warm days.
– Cut small ventilation holes covered with mesh to allow airflow while keeping pests out.
– Install small vents with flaps that can be opened and closed as needed.
## **Maintenance and Care Tips**
To ensure the longevity and efficiency of your hoophouse, follow these maintenance tips:
1. **Regular Inspections** – Check for any damage after storms or heavy winds. Replace any broken or worn-out parts.
2. **Plastic Sheeting Replacement** – Over time, the plastic may become brittle or torn. Replace it as needed to maintain insulation.
3. **Hinge Lubrication** – Keep hinges well-lubricated to ensure smooth opening and closing.
4. **Seasonal Adjustments** – In extremely hot weather, remove the plastic and use shade cloth instead to prevent overheating.
## **Final Thoughts**
A DIY hinged hoophouse is a cost-effective and efficient way to protect your raised bed garden from harsh weather, pests, and temperature fluctuations. By following this step-by-step guide, you can create a functional, durable, and easy-to-use hoophouse that extends your growing season and maximizes your garden’s productivity. Whether you’re a beginner or an experienced gardener, this project is a worthwhile addition to your gardening setup.
Start building your hinged hoophouse today and enjoy fresh, homegrown produce all year round