
If you’re looking for a sustainable, natural, and visually appealing way to create raised garden beds, a wattle garden bed is the perfect solution. This traditional method of garden construction uses woven wooden branches or twigs to create a sturdy, eco-friendly border that not only looks beautiful but also benefits your plants by allowing for proper drainage and root growth. In this guide, we will show you how to build your own wattle raised garden bed, and why it’s an excellent project for both beginners and experienced gardeners.
### **What Is a Wattle Raised Garden Bed?**
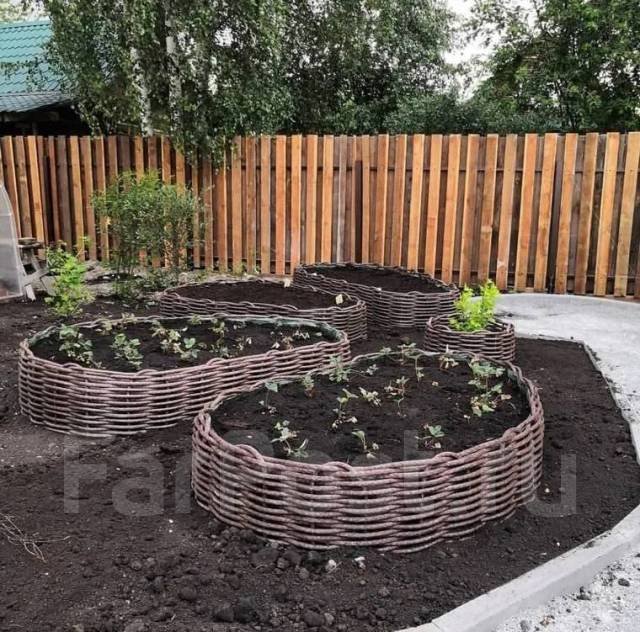
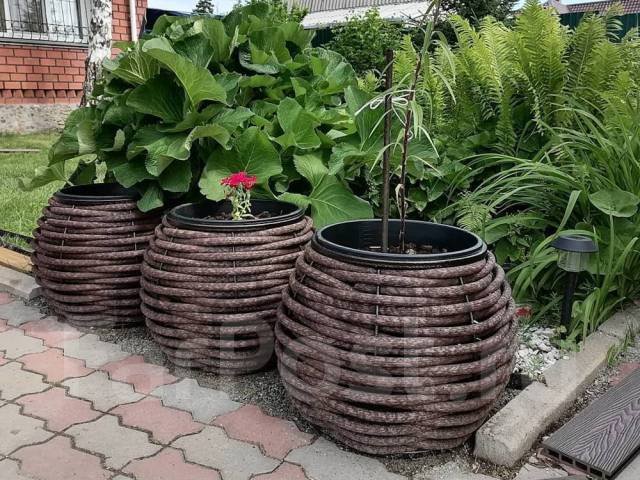
A wattle raised garden bed is a form of garden edging made from woven branches, usually from fast-growing and sustainable materials like willow, hazel, or other flexible wood. This construction technique dates back centuries and has been used for building fences, walls, and garden borders.
The benefits of using wattle for your raised garden bed include:
– **Sustainability**: Wattle fences are made from natural, renewable resources.
– **Aesthetic Appeal**: The woven design adds a rustic, organic look to your garden.
– **Durability**: When properly built, wattle garden beds are strong, sturdy, and long-lasting.
– **Drainage**: The gaps between the woven branches provide excellent drainage, which is essential for healthy plant roots.
### **Materials You’ll Need for a Wattle Raised Garden Bed**
Before you get started, gather the following materials:
– **Flexible branches** (willow, hazel, or other twigs are ideal)
– **Strong posts or wooden stakes** (these will act as the framework for your wattle structure)
– **A saw** (for cutting larger posts to the right size)
– **Pruners** (to cut the branches to manageable lengths)
– **Twine or garden wire** (to tie the branches in place)
– **A shovel** (for digging the posts into the ground)
– **A measuring tape** (for accurate spacing)
### **Step-by-Step Guide to Building Your Wattle Raised Garden Bed**
#### **Step 1: Choose the Right Location**
Find a flat, sunny spot in your garden for your raised bed. Most plants thrive with at least 6 hours of direct sunlight, so choose your location accordingly. Clear any weeds or debris from the area to make room for the bed.
#### **Step 2: Measure and Mark the Shape**
Decide on the size and shape of your wattle garden bed. Raised garden beds typically range in width from 3-4 feet to allow for easy access to the center. Use a measuring tape to outline the area where you want the bed to be, and mark the edges with stakes or string.
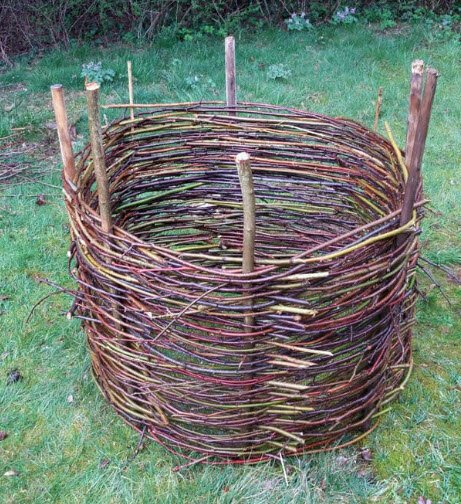
#### **Step 3: Dig and Place the Posts**
Dig small holes at the corners and along the perimeter of your marked area to hold the posts. These posts will form the frame of the wattle bed. Place the posts about 1 to 1.5 feet apart. The height of the posts can vary, but they should be tall enough to create a raised bed that’s about 12-18 inches high. Make sure the posts are firmly in the ground to ensure the stability of the structure.
#### **Step 4: Weave the Branches**
Once the posts are in place, it’s time to start weaving the branches. Start at the base of the posts and weave the flexible branches in and out, creating a woven pattern. Weave each new branch in the same direction to ensure a consistent look. As you work your way up the posts, the woven branches should hold each other in place, forming the sides of the raised bed. Make sure to keep the weaving tight, but not so tight that it stresses the branches.
#### **Step 5: Secure the Wattle with Twine or Wire**
As you weave, use twine or garden wire to secure the branches in place. Tie off each end to the posts to keep the structure from unraveling. You can also use wire to add extra strength to the structure if needed, especially if the bed is large.
#### **Step 6: Fill the Bed with Soil**
Once your wattle structure is complete, it’s time to fill the raised bed with high-quality soil. Use a mixture of compost, topsoil, and organic matter to create a nutrient-rich environment for your plants. A good rule of thumb is to fill the bed with 60% soil, 30% compost, and 10% perlite or sand for drainage. Ensure that the soil is evenly distributed and firmed down gently.
#### **Step 7: Plant Your Garden**
With the bed now filled with soil, you can start planting your garden Choose plants that suit the sunlight and climate conditions in your area. Vegetables like tomatoes, lettuce, and peppers do well in raised beds, as do flowers and herbs. The excellent drainage from the wattle structure ensures that your plants will thrive in a well-balanced, healthy environment.
### **Benefits of a Wattle Raised Garden Bed**
– **Eco-Friendly**: Using branches from local, fast-growing trees makes this project sustainable and reduces the carbon footprint of your garden.
– **Aesthetic Appeal**: The woven, rustic look adds a charming, natural touch to your garden design.
– **Improved Drainage**: The gaps between the twigs allow water to flow freely, preventing waterlogging and root rot.
– **Enhanced Soil Quality**: The raised nature of the bed allows for better soil aeration, promoting root health.
– **Durability**: With the right materials and construction, a wattle raised bed can last for years, providing long-term benefits to your garden.
### **A Sustainable Garden Solution**
Building a wattle raised garden bed is a simple, cost-effective, and sustainable way to enhance your gardening experience. Not only does it provide a beautiful, eco-friendly solution to raised gardening, but it also ensures that your plants receive optimal growing conditions. With just a few materials and some basic construction skills, you can create a sturdy, long-lasting garden bed that will boost the health and productivity of your plants.
Ready to start your own wattle garden bed? Follow these simple steps and enjoy the rewards of sustainable gardening, all while adding a touch of rustic charm to your outdoor space