Gardening can be a rewarding experience, but it often requires a lot of time and effort. If you’re looking for a way to simplify the process and help your plants thrive, self-watering seed pots made from recycled items could be the solution you need. Not only are these self-watering pots eco-friendly and easy to make, but they also reduce the amount of time and energy spent on watering your plants.
In this article, we’ll show you how to create your very own self-watering seed pots using everyday recycled materials. Let’s dive into this easy and sustainable DIY gardening project
### Why Choose Self-Watering Pots? 🌱💧
Self-watering pots are a fantastic gardening tool for busy gardeners or those looking to conserve water. These pots work by utilizing a capillary action, allowing the plant to draw moisture from the bottom of the pot as needed. This ensures that your plants stay hydrated consistently without the risk of overwatering or underwatering.
By making your own self-watering pots from recycled items, you not only contribute to reducing waste but also create a more efficient and sustainable gardening solution.
### Materials You’ll Need for Your Self-Watering Seed Pots 🛠️♻️
Here’s what you’ll need to make your self-watering pots using items you already have at home:
– **Plastic Bottles** (empty and clean – 2 for each pot)
– **Scissors or Utility Knife**
– **Cotton String or Rope** (a piece long enough to reach from the bottom of the pot to the soil)
– **Potting Soil**
– **Seeds** (of your choice)
– **A Plastic Tray** (optional, to catch any excess water)
### Step-by-Step Guide to Creating Self-Watering Seed Pots 🌿✨
Follow these easy steps to create your self-watering pots:
#### Step 1: **Prepare the Plastic Bottles**
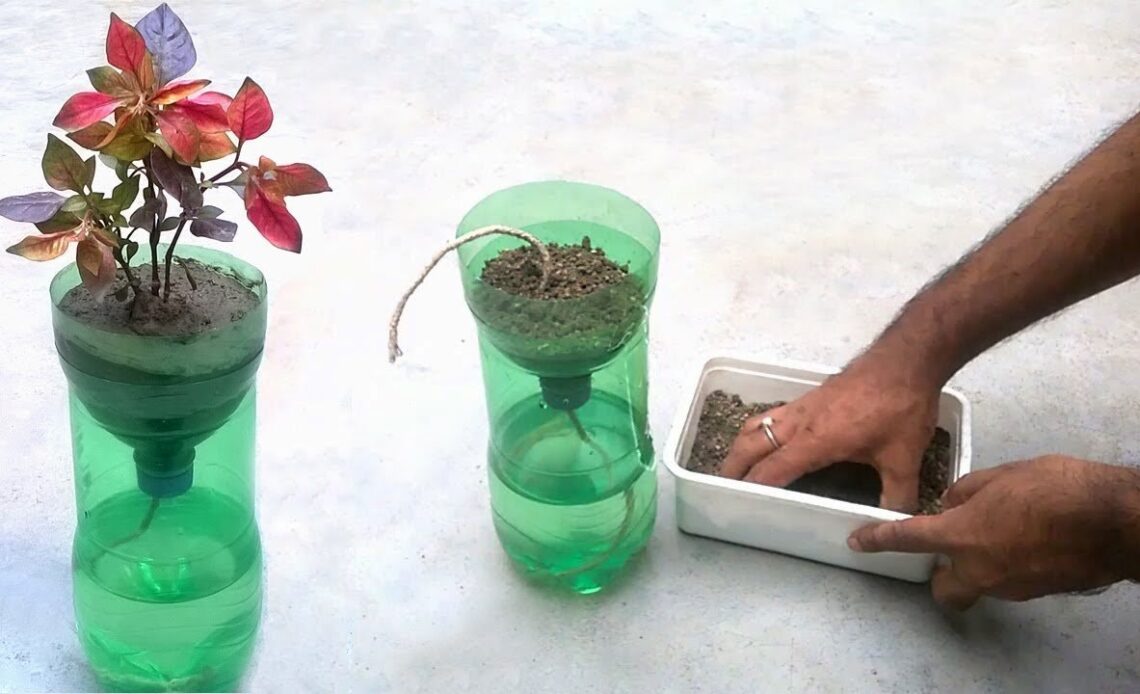
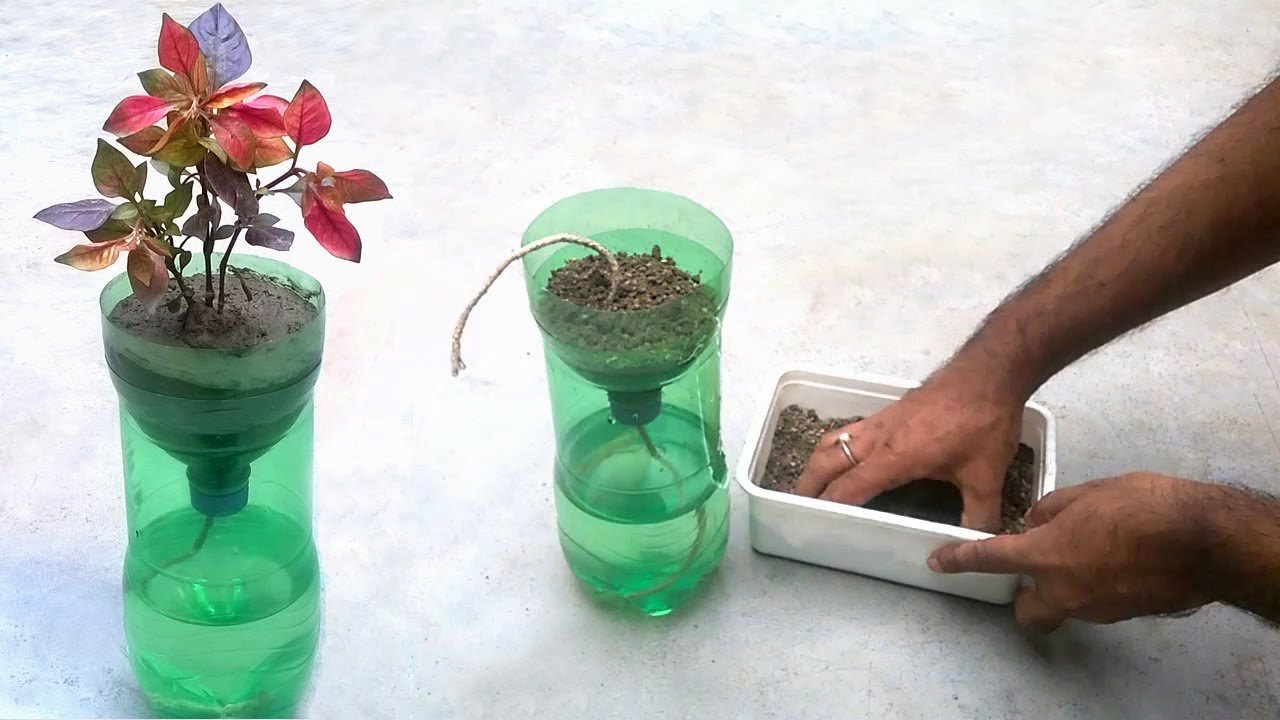
Start by collecting your plastic bottles. You will need two for each self-watering pot: one for the base that holds water and one for the pot that holds the soil and plants.
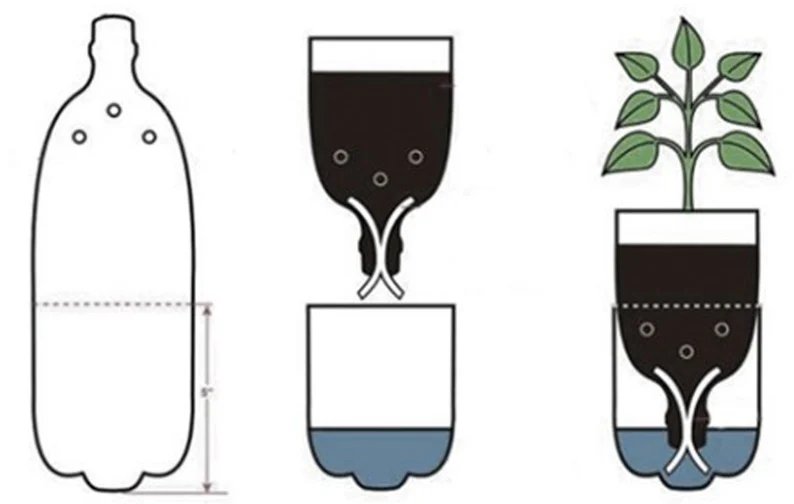
– Take the first bottle and cut it in half. You’ll use the bottom half to create the base where the water will be stored.
– For the second bottle, you’ll need to cut off the bottom (leave the neck intact) to create the container where the soil and seeds will go. This will sit on top of the water-holding section.
#### Step 2: **Create the Wick System**
To allow the water to reach the plant roots, you’ll need to create a wick system using cotton string or rope. This is how the water moves up into the soil, providing hydration to the plant.
– Cut a piece of cotton string or rope that’s long enough to reach from the bottom of the base bottle to the top of the pot.
– Thread the string through the cap of the first bottle (the one that will hold the water). Make a small hole in the cap and pull the string through, leaving one end inside the bottle.
– The other end of the string should be placed in the soil of the second bottle (where the plant will grow). This will allow the string to draw up water as needed.
#### Step 3: **Assemble the Pot**
Now, it’s time to assemble the self-watering system.
– Place the second bottle (the one with the open bottom) into the first bottle (the one holding water) with the wick string running from the water base up into the soil.
– Ensure that the string is in direct contact with both the water at the bottom and the soil in the top portion. This will allow the water to travel up the string into the soil as it dries out.
– If you’d like, place the entire assembly in a small plastic tray to catch any excess water that may spill out.
#### Step 4: **Add Soil and Seeds**
Once your self-watering pot is assembled, it’s time to fill it with potting soil.
– Fill the top bottle (the one where the plant will grow) with a good quality potting mix, leaving some space at the top.
– Create small holes in the soil for your seeds. Follow the instructions on your seed packet for the proper planting depth.
– Gently place your seeds into the soil and cover them lightly with more soil.
#### Step 5: **Watering and Maintenance**
After planting, the self-watering system will take care of the rest. Fill the bottom bottle with water, and the wick system will gradually transfer moisture to the soil as it dries out. This ensures your plants receive a consistent supply of water without the need for frequent manual watering.
– Check the water level regularly and top it up as needed.
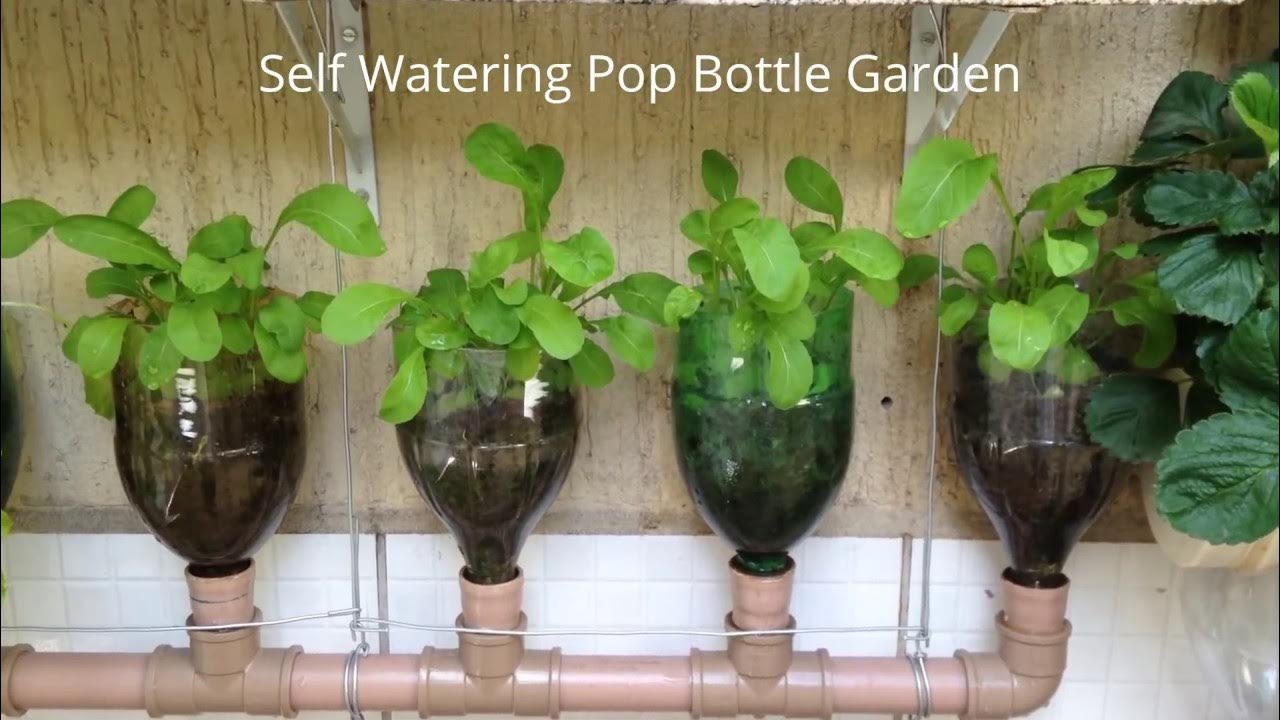
– Keep your self-watering seed pot in a sunny spot to help the seeds germinate and grow.
### Benefits of Self-Watering Seed Pots Made from Recycled Materials 🌍🌱
Using recycled materials to create self-watering pots offers several benefits:
1. **Eco-Friendly**: By repurposing plastic bottles, you’re helping to reduce waste and promote sustainability.
2. **Water Conservation**: Self-watering pots are designed to minimize water waste, making them ideal for areas with limited water supply.
3. **Less Maintenance**: These pots reduce the need for frequent watering, making them great for busy gardeners or those who travel frequently.
4. **Cost-Effective**: Making your own self-watering pots from recycled items is an inexpensive way to improve your gardening setup.
5. **Improved Plant Health**: Consistent hydration promotes healthy plant growth and reduces the risk of overwatering or underwatering.
### Final Thoughts: A Simple, Sustainable Gardening Solution 🌿💡
Self-watering seed pots are a clever and eco-friendly way to care for your plants, and creating them from recycled materials is both fun and rewarding. By following the simple steps in this guide, you can help your plants thrive while minimizing waste and conserving water.
Ready to give it a try? Gather your materials, get creative, and start your sustainable gardening journey today