
Orchids are among the most beautiful and elegant plants you can have in your home, but they can sometimes be tricky to care for. If you’ve noticed that your orchid leaves are looking a bit lackluster or that your blooms are fewer than usual, don’t worry There’s a simple, effective trick that can bring your orchid back to life, encouraging lush, green leaves and an abundance of vibrant flowers.
Let’s dive into how you can revive your orchid leaves and get your plant to bloom profusely again, with minimal effort
### Why Orchid Leaves Might Be Struggling
Before we get into the trick, it’s important to understand why orchid leaves may not be thriving. Orchids can become stressed for various reasons, such as:
– **Improper watering**: Both overwatering and underwatering can lead to unhealthy leaves.
– **Lack of light**: Orchids need indirect light to thrive. Too little light can cause leaves to yellow, while too much direct sunlight can burn them.
– **Nutrient deficiencies**: Without the right nutrients, orchids can struggle to grow new leaves and produce flowers.
– **Temperature fluctuations**: Orchids prefer stable temperatures, typically between 65°F and 75°F (18°C and 24°C).
If your orchid leaves are yellowing, wrinkling, or showing signs of distress, it’s time to take action and revive your plant.
### The Simple Trick to Revive Orchid Leaves and Boost Blooms
Now, here’s the trick that will help bring your orchid leaves back to life and encourage those stunning blooms:
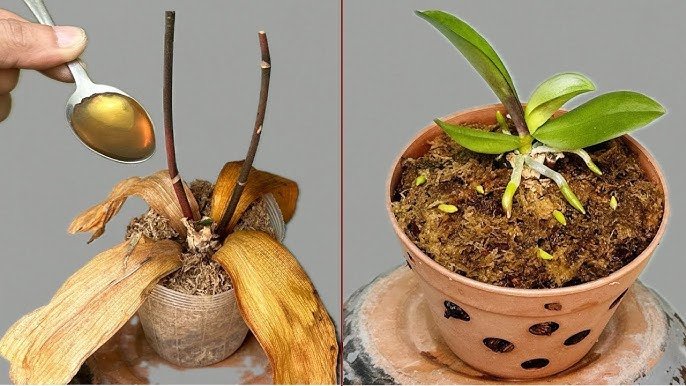
#### **1. Soak Your Orchid in a Nutrient-Rich Solution**
A great way to revive both your orchid’s leaves and its blooming potential is by soaking it in a **nutrient-rich solution** that promotes leaf health and encourages blooming. Here’s how you can create the perfect solution at home:
– **Ingredients**:
– 1 tablespoon of **Epsom salt** (magnesium sulfate)
– 1 gallon of **water** (preferably filtered or distilled water)
Epsom salt is rich in magnesium, which is essential for photosynthesis and healthy leaf growth. It also helps orchids absorb other key nutrients and can enhance the flowering process.
#### **How to Apply**:
1. **Mix the Solution**: In a large container, mix 1 tablespoon of Epsom salt with a gallon of water. Stir the solution until the salt is fully dissolved.
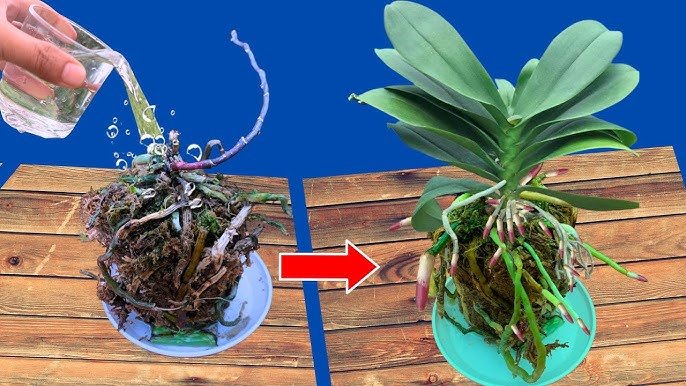
2. **Soak Your Orchid**: Remove your orchid from its pot and place the roots in the solution, ensuring that the roots are fully submerged. Let it soak for **10-15 minutes**.
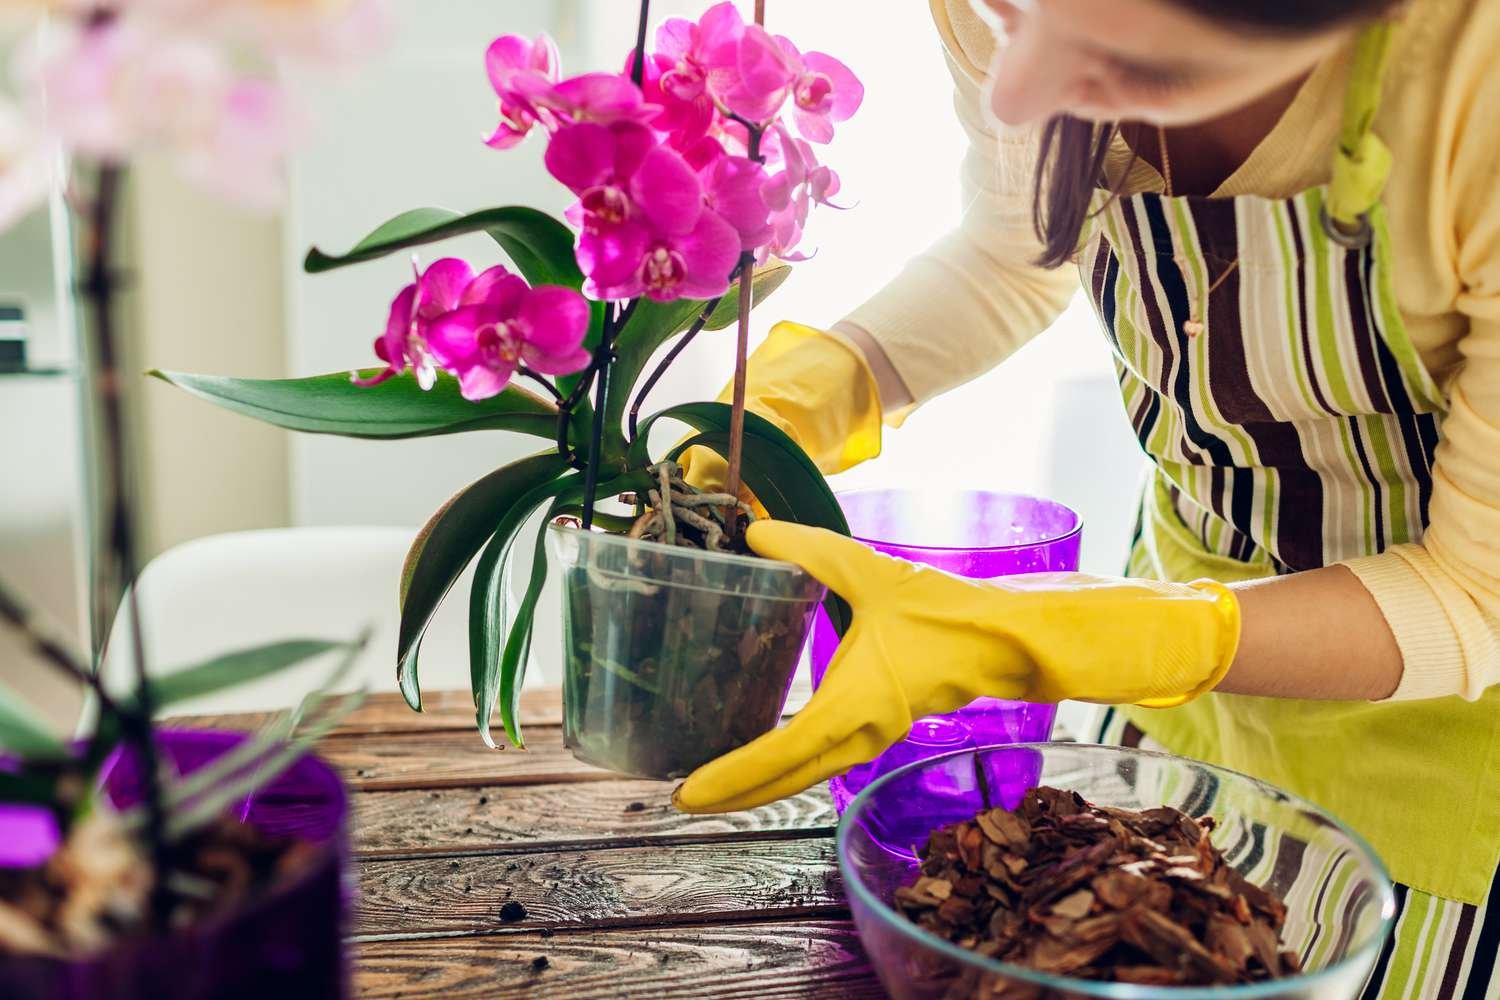
3. **Drain and Re-pot**: After soaking, allow the orchid to drain completely, then re-pot it in its original container. Be sure to check the roots and remove any dead or rotting parts before re-potting.
This soak will help replenish the magnesium in the soil, which is crucial for revitalizing the leaves and encouraging the orchid to bloom.
#### **2. Provide Optimal Care for Maximum Results**
After soaking your orchid, it’s important to maintain optimal growing conditions to ensure your plant continues to thrive.
– **Watering**: Orchids prefer to dry out between waterings. Water your orchid when the top inch of soil feels dry to the touch. Avoid letting water sit in the bottom of the pot, as this can lead to root rot.
– **Light**: Place your orchid in a spot with bright, indirect sunlight. If the leaves are turning yellow, it might be a sign that it’s receiving too much direct sunlight.
– **Humidity**: Orchids love humidity You can increase humidity by placing a tray of water near your plant or using a humidifier.
– **Fertilization**: Use a balanced orchid fertilizer once a month to provide essential nutrients. During the growing season, you can increase the frequency to every two weeks.
#### **3. Prune and Remove Dead Leaves**
Pruning is an essential part of orchid care. If you notice any yellowing or dead leaves, it’s important to trim them off. This helps the plant focus its energy on healthy growth and new blooms. Use clean, sharp scissors to carefully cut off damaged or dead leaves at the base of the plant. This also helps reduce the risk of disease.
#### **4. Be Patient**
It can take some time for your orchid to show signs of recovery, so be patient. Orchids are slow-growing plants, and while they’re tough, they need time to bounce back from stress. Keep up with proper care, and soon you’ll see new green leaves sprouting and, ultimately, those gorgeous flowers returning.
### The Benefits of This Simple Trick
By using this simple Epsom salt soak, you’re providing your orchid with the nutrients it needs to thrive. Here’s what you can expect as a result:
– **Revitalized Leaves**: Healthy, lush green leaves that indicate a strong, thriving plant.
– **More Blooms**: Increased chances of prolific, long-lasting blooms.
– **Stronger Roots**: Encourages healthy root development, which is key to overall plant health.
– **Sustained Growth**: With the right nutrients, your orchid will continue to grow and bloom year after year.
If you’ve been struggling with your orchid’s health, especially its leaves and blooming ability, this simple Epsom salt trick can make all the difference. By soaking your orchid in this nutrient-rich solution and providing optimal care, you’ll encourage healthy growth, vibrant leaves, and an abundance of stunning blooms.
Orchids are resilient plants, and with the right care, they can thrive for years. Try this trick today and watch your orchid flourish like never before