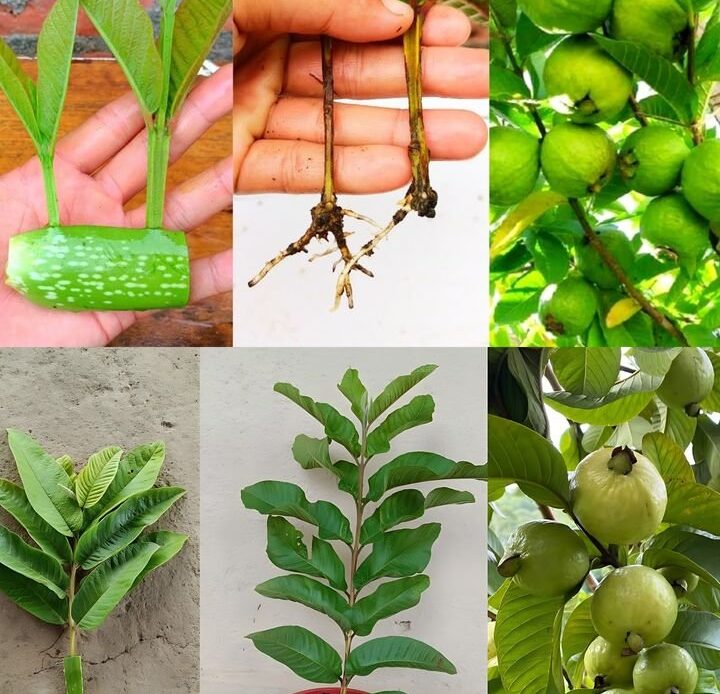
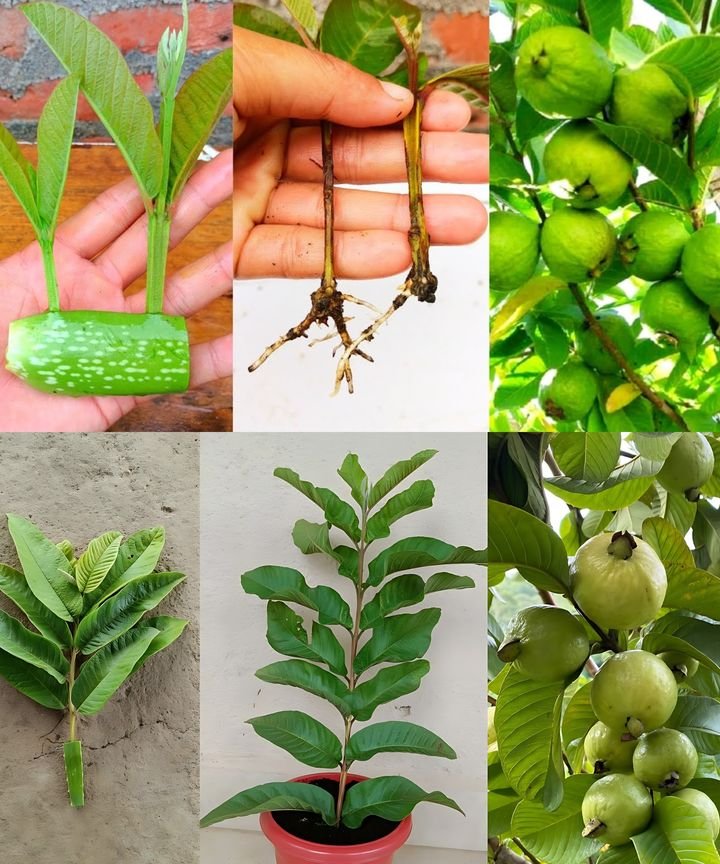
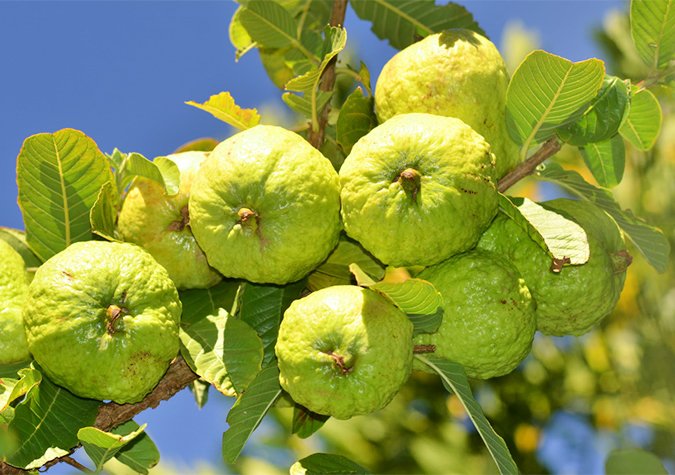
Guava trees are not only a delightful addition to your garden, but they also provide sweet, nutritious fruits that can be enjoyed in a variety of dishes. If you’ve ever wanted to grow your own guava tree but didn’t want to start from scratch with seeds, propagating the tree from **cuttings** is a fast, efficient, and beginner-friendly method. In this guide, we will teach you how to propagate **guava trees** using **cuttings and aloe vera**, a natural rooting aid that encourages faster root growth.
Propagation by cuttings is an accessible way to create multiple guava trees from a single plant, and it’s an ideal technique for beginners who want to start growing guavas without too much hassle. Aloe vera, with its healing and growth-promoting properties, helps to create an environment that encourages healthy root development.
If you’re ready to start your own guava-growing journey, keep reading This step-by-step guide will take you through the materials you’ll need, a detailed step-by-step guide to propagation, and expert tips for success.
### Why Propagate Guava Trees by Cuttings?
Propagating guava trees through **cuttings** offers several benefits. First and foremost, it’s much faster than starting from seed, as cuttings allow you to grow a tree that’s genetically identical to the parent plant. Additionally, cuttings typically establish themselves faster, meaning you can expect to see fruits on your tree sooner than if you were starting from a seed.
Here are some advantages of propagating guava trees via cuttings:
– **Faster Growth**: Propagating from cuttings can lead to quicker results compared to growing from seed, so you’ll get to enjoy fruit sooner.
– **Identical Traits**: Since the cutting is from a mature, healthy guava tree, the new tree will share the same characteristics, including fruit quality and tree size.
– **Cost-Effective**: Propagating by cuttings reduces the need to purchase multiple plants and allows you to grow several trees from one original plant.
– **Beginner-Friendly**: This method is relatively easy and doesn’t require advanced gardening knowledge.
### Why Use Aloe Vera for Guava Tree Cuttings?
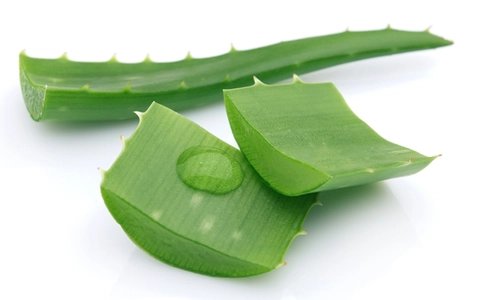
Aloe vera is a miracle plant when it comes to promoting root growth. It contains **growth hormones**, **enzymes**, and **vitamins** that encourage faster rooting and prevent cutting decay. When you dip the cut end of the guava cutting in **aloe vera gel** or use fresh aloe vera, it acts as a natural rooting hormone that increases the likelihood of success.
Here’s how aloe vera benefits guava tree propagation:
– **Stimulates Rooting**: Aloe vera contains **auxins**, which are plant hormones that promote root formation. This helps the cutting form healthy roots faster.
– **Prevents Infection**: Aloe vera’s antimicrobial properties help prevent fungal or bacterial infections, which can be common when propagating plants.
– **Hydrates**: Aloe vera gel helps keep the cutting hydrated while it develops roots, preventing dehydration, which can otherwise stunt growth.
### Materials Needed for Propagating Guava Trees with Cuttings & Aloe Vera
Before getting started with propagating your guava tree, gather the necessary materials. Here’s a list of what you’ll need:
– **Healthy Guava Tree**: Choose a mature, healthy guava tree with strong branches that are free from pests and diseases.
– **Sharp, Clean Pruning Shears**: You’ll need clean, sharp pruning shears to cut the guava branches. Clean cuts reduce the chance of infection.
– **Aloe Vera Plant or Store-Bought Aloe Vera Gel**: Fresh aloe vera gel is preferred, but if you don’t have an aloe vera plant, you can use store-bought gel.
– **Small Pots or Containers**: Choose small pots that are about 3-4 inches in diameter for each cutting. Ensure they have drainage holes.
– **Well-Draining Potting Mix**: Guava trees prefer soil that drains well. A potting mix designed for cacti or succulents will work well.
– **Clear Plastic Bag or Humidity Dome (Optional)**: Creating humidity around the cutting can help it root faster. You can use a clear plastic bag or a humidity dome to cover the pot.
– **Watering Can**: A watering can or gentle sprayer to water the cutting without disturbing it.
### Step-by-Step Guide to Propagating Guava Trees with Cuttings & Aloe Vera
Now that you have all your materials ready, it’s time to start propagating your guava tree. Follow these easy steps for success
#### Step 1: Select Healthy Cuttings
Choosing the right cutting is essential for successful propagation. Look for a **semi-hardwood** branch from the parent guava tree. Semi-hardwood cuttings are neither too soft nor too old, making them ideal for rooting. Your cutting should be about 6-8 inches long and have at least two or three leaf nodes (the spots where leaves grow along the stem).
– **Choose a healthy branch**: Make sure the branch is free from pests and diseases, and it should be from a mature, healthy tree.
– **Use clean shears**: Clean your pruning shears before cutting to prevent contamination. Make a **clean cut** just below a leaf node.
#### Step 2: Prepare the Cuttings
Once you have the cuttings, it’s time to prepare them for planting. Remove any leaves from the bottom half of the cutting, leaving just a few leaves at the top. This will help reduce moisture loss while the cutting is developing roots.
Now, take your fresh **aloe vera gel** (either from the plant or store-bought) and dip the cut end of the guava cutting into the gel. Aloe vera will help seal the wound and encourage healthy root formation. If you’re using a fresh aloe vera leaf, simply cut it open and extract the gel.
– **Remove lower leaves**: Strip the lower half of the cutting to avoid rot when it is planted in the soil.
– **Dip in Aloe Vera**: Coat the cut end of the cutting with fresh aloe vera gel to stimulate root growth and prevent infection.
#### Step 3: Plant the Cuttings
Now it’s time to plant the cutting. Fill your pots with well-draining potting mix. A cactus or succulent mix is ideal, as it provides the right balance of moisture retention and drainage.
– **Prepare the potting mix**: Ensure that the mix is loose and well-draining, allowing the roots to grow easily.
– **Plant the cutting**: Insert the aloe-coated cutting into the soil, pushing it in about 2-3 inches deep. Gently press the soil around the cutting to secure it in place.
#### Step 4: Provide Proper Care
Proper care is essential during the rooting process. Guava cuttings need moisture, warmth, and indirect light to thrive.
– **Water the cutting**: Gently water the cutting to ensure that the soil is moist but not waterlogged. Overwatering can lead to root rot.
– **Create humidity**: Cover the pot with a **clear plastic bag** or **humidity dome** to retain moisture and create a greenhouse effect. This will help maintain the necessary humidity levels for root development.
– **Provide indirect sunlight**: Place the pot in a warm, well-lit spot with indirect sunlight. Avoid direct sunlight, as this can stress the cutting and cause it to dry out.
#### Step 5: Monitor Growth
After a few weeks, check the cuttings to see if they have started to develop roots. Gently tug on the cutting to see if there is any resistance. If you feel resistance, this is a sign that roots have begun to form.
– **Check for roots**: Tug gently on the cutting to check for root resistance. This can take several weeks, so be patient.
– **Continue watering**: Keep the soil consistently moist, but don’t overwater. Ensure that the cutting is not sitting in standing water.
#### Step 6: Transplant the Cuttings
Once your cuttings have developed strong roots and new growth, it’s time to transplant them into larger pots or directly into your garden.
– **Transplant to larger pots**: If you’re growing your guava tree in a pot, move the cutting to a larger container with rich, well-draining soil.
– **Transplant to the ground**: If you’re planting the tree in the garden, ensure that the soil is rich in nutrients, and the site receives plenty of sunlight.
#### Tips for Success:
– **Use fresh aloe vera**: Fresh aloe gel promotes better root development.
– **Maintain moisture**: Keep the soil consistently moist but avoid overwatering.
– **Be patient**: Rooting can take several weeks, so give the cutting time to develop.
– **Monitor plant health**: Regularly check for pests, diseases, or signs of stress.
### Common Problems and How to Avoid Them

While propagating guava trees by cuttings is a straightforward process, there are a few challenges you might face along the way. Here are some common problems and how to prevent them:
– **Root Rot**: Overwatering is a common cause of root rot. Ensure your pots have drainage holes and allow excess water to escape. Water the cutting only when the top inch of soil is dry.
– **Lack of Rooting**: If the cutting doesn’t root, check the cutting for freshness and ensure the soil is warm enough. Keep the humidity levels high and ensure the cutting is in indirect sunlight.
– **Wilting or Yellowing Leaves**: This could be a sign of overexposure to sunlight or inconsistent watering. Move the cutting to a cooler spot with indirect light and adjust watering habits.
### Conclusion: Enjoy Your Own Guava Trees
By following these simple steps and utilizing the power of **aloe vera**, you can successfully propagate guava trees from cuttings. Not only is this a fun and cost-effective way to grow your own fruit trees, but it also allows you to share the joy of growing guavas with family and friends.
Guava trees can thrive in a variety of environments, and with the right care, you’ll soon have your own fresh fruit to enjoy. Happy planting, and enjoy the delicious rewards of your efforts 🌱🍍