If you’ve ever wanted to grow your own spices, you might have considered starting with a familiar herb or plant like basil or mint. But what about **cloves**? This aromatic spice, often found in both savory and sweet dishes, can be a rewarding addition to your garden. Growing your own cloves isn’t as difficult as it sounds, and with the right approach, you can cultivate these flavorful buds from **seed to spice** in the comfort of your own home or garden.
In this comprehensive guide, we will walk you through the **easy steps** of cultivating cloves—from selecting and germinating the seeds to harvesting and storing your very own crop. Not only will you have the satisfaction of growing your own spices, but you will also have fresh, aromatic cloves at your disposal, perfect for cooking, medicinal purposes, and more.
### Why Grow Your Own Cloves?
Before diving into the cultivation process, it’s important to understand why growing your own cloves is a great idea:
1. **Freshness**: Home-grown cloves are fresher than store-bought ones, meaning they have a more potent aroma and flavor.
2. **Satisfaction**: There’s immense satisfaction in growing your own spices, knowing you have nurtured them from seed to harvest.
3. **Cost-Effective**: Growing your own cloves can save money in the long run, as store-bought spices can be expensive.
4. **Health Benefits**: Cloves are known for their medicinal properties, such as anti-inflammatory and antibacterial effects. Having fresh cloves available means you can utilize them for both culinary and medicinal purposes.
### Materials You’ll Need to Grow Cloves
Growing cloves requires some basic tools and materials, but don’t worry—none of them are hard to find or expensive. Here’s what you will need:
1. **Fresh Clove Seeds**: Always select high-quality seeds that are free from damage or mold. Fresh seeds will have a much higher germination rate.
2. **Scarification Tools**: Scarifying seeds (lightly nicking or scratching the seed coat) is essential for improving germination. A small knife or sandpaper will work well.
3. **Warm Water**: To soak the seeds before planting.
4. **Well-Draining Potting Mix or Sandy Loam Soil**: Cloves prefer well-draining soil that retains moisture but does not stay soggy.
5. **Small Pots or Seedling Trays**: To sow the seeds initially. Make sure they have drainage holes.
6. **Clear Plastic Cover or Humidity Dome**: This will help maintain a humid environment for the seeds and seedlings.
7. **Pruning Shears**: For harvesting the clove buds.
8. **Airtight Container**: For storing the dried cloves once they’re harvested.
### Step-by-Step Guide to Growing Cloves 🌱
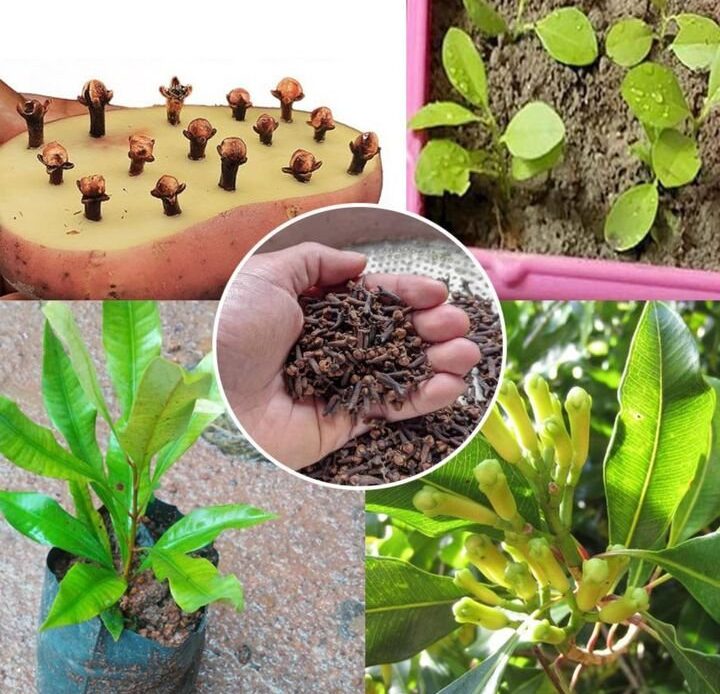
#### Step 1: Selecting Clove Seeds
To begin, you need to select high-quality clove seeds. These are typically obtained from the clove plant (Syzygium aromaticum), which is native to tropical regions like Indonesia, Madagascar, and India. You can buy seeds from a reputable nursery or online supplier.
When selecting seeds, ensure they are:
– **Fresh**: Fresh seeds have a higher germination rate, so choose seeds that haven’t been stored for too long.
– **Free from Damage**: Check for any cracks, mold, or damage. Damaged seeds are less likely to germinate properly.
If you’re using clove seeds from your own plant, you’ll want to harvest them when they’re mature but not fully opened. They should be firm to the touch and free from any decay.
#### Step 2: Germinating Clove Seeds
Germinating clove seeds can be a little tricky, as they have a hard seed coat that makes it difficult for water to penetrate. To improve the germination rate, you’ll need to **scarify** the seeds.
1. **Scarify the Seeds**: Gently nick the outer seed coat with a sharp knife or use sandpaper to scarify the seed. This will allow moisture to penetrate and promote faster germination. Be careful not to damage the embryo inside the seed.
2. **Soak the Seeds**: Place the scarified seeds in warm water for **24 hours**. This soaking process helps soften the seed coat further and encourages sprouting.
3. **Prepare for Planting**: After soaking, the seeds are ready to be planted in your chosen potting mix.
#### Step 3: Planting Clove Seeds
Cloves thrive in **well-draining soil** with a slightly acidic to neutral pH (6.0 to 7.0). For best results, you’ll want to sow your seeds in small pots or seedling trays that allow for easy management of the seedlings before transplanting them into the ground.
Here’s how to plant your soaked, scarified seeds:
1. **Prepare the Potting Mix**: Use a **well-draining potting mix** or a **sandy loam soil**. You can mix regular potting soil with sand or perlite to increase drainage. Make sure the soil is light and airy for the roots to grow without obstruction.
2. **Sow the Seeds**: Fill your pots or seedling trays with the prepared soil and plant the clove seeds about **½ inch deep**. Space the seeds a few inches apart to allow for adequate root growth.
3. **Moisture is Key**: Water the soil gently after planting. Keep the soil moist, but not soaked, as too much water can cause the seeds to rot.
4. **Maintain Humidity**: To help with germination, cover the pots with a **clear plastic cover** or **humidity dome**. This will keep the moisture levels high and create a greenhouse-like environment. Place the pots in a **warm** location with **indirect sunlight**.
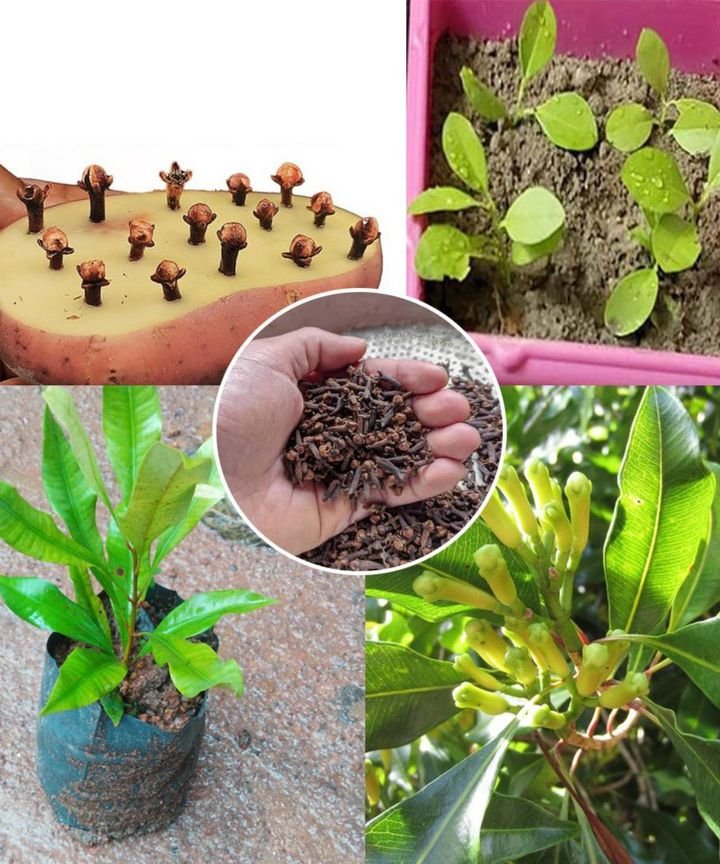
#### Step 4: Caring for Clove Seedlings
Once the seeds begin to sprout, the real work begins. Proper care is crucial during the early stages of seedling growth.
1. **Light**: Provide bright, **indirect sunlight**. Clove seedlings do not tolerate full sun when they’re young, as direct light can scorch them. Keep them in a location where they receive adequate light without being exposed to harsh sun rays.
2. **Watering**: Water the seedlings regularly to keep the soil consistently moist. Make sure the pots have drainage holes to prevent waterlogging.
3. **Temperature**: Cloves are native to tropical climates and thrive in **warm** temperatures (around **70-85°F** or **21-29°C**). Keep the seedlings in a warm, sheltered area to encourage healthy growth.
4. **Fertilization**: After the seedlings develop a few sets of leaves, you can start applying a **balanced fertilizer**. Use a fertilizer designed for young plants or houseplants. Apply it lightly once a month, but be careful not to over-fertilize.
#### Step 5: Transplanting Seedlings
Once the clove seedlings have grown large enough and developed strong roots, they can be **transplanted** into a larger container or directly into the garden. At this stage, you’ll want to ensure that the plant has **healthy root systems** and is ready for more space to grow.
– **Transplanting to the Garden**: Choose a sunny, well-drained spot in your garden for transplanting. Make sure the soil is rich and fertile. Dig a hole large enough to accommodate the root ball of the seedling. Gently remove the seedling from the pot, place it into the hole, and cover it with soil.
– **Transplanting to Larger Pots**: If you are growing the clove tree in containers, choose a larger pot with adequate drainage. Fill the pot with a well-draining potting mix and transplant the seedling carefully, pressing the soil gently around the base.
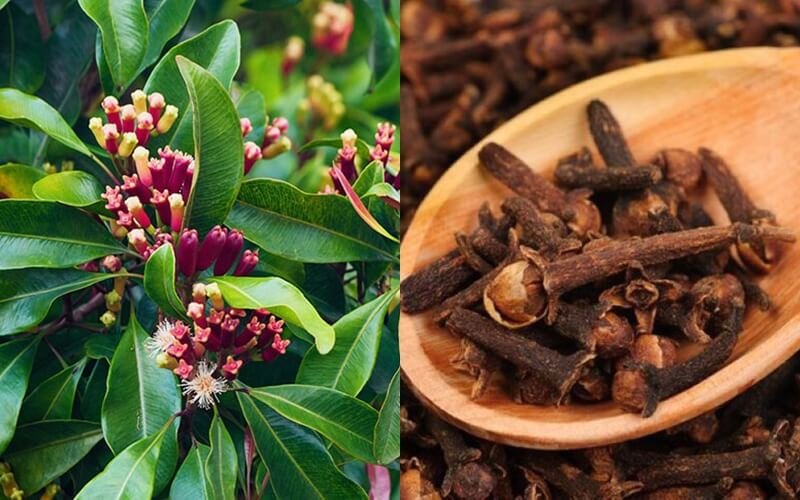
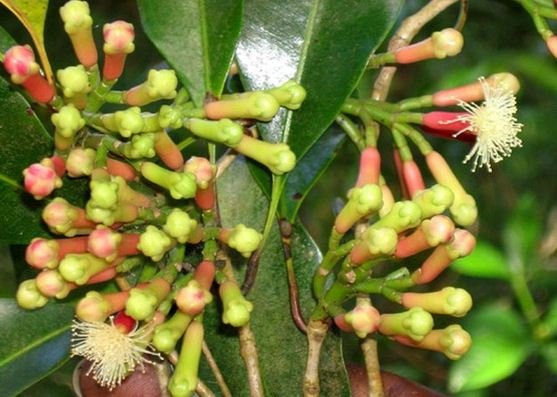
#### Step 6: Harvesting Cloves
It takes time for the **clove tree** to mature enough to produce spice, typically around **3-4 years**. However, once it begins to flower, you’ll see clusters of buds emerge from the branches. The buds turn from green to **pinkish-red**, signaling that they are ready for harvest.
– **Harvesting the Flower Buds**: Using sharp **pruning shears**, carefully cut the flower buds just before they fully open. This is the point at which cloves are most aromatic and flavorful. Be sure to handle the buds gently to avoid damaging them.
– **Drying the Cloves**: Once harvested, lay the clove buds in a **warm, well-ventilated area** to dry. This can take several days to a week, depending on humidity levels. You’ll know the cloves are fully dried when they turn **dark brown** and become hard.
#### Step 7: Drying and Storing Cloves
Once your cloves are fully dried, it’s time to store them properly to preserve their flavor and aroma:
1. **Storage**: Store dried cloves in an **airtight container** in a **cool, dry place**, away from sunlight. Proper storage ensures that your cloves retain their powerful aroma and taste for a long time.
2. **Use in Cooking**: Freshly harvested and dried cloves can be used in a variety of culinary dishes, including stews, soups, curries, and desserts. They can also be used for medicinal purposes or in essential oils.
### Conclusion: From Seed to Spice—Grow Your Own Cloves Today
Growing cloves is a rewarding experience that allows you to cultivate your own spice from start to finish. By following these simple steps—selecting high-quality seeds, scarifying them, planting them in well-draining soil, and caring for them as they grow—you’ll be able to enjoy **big, fragrant, and flavorful cloves** that are perfect for your kitchen or your medicinal pantry.
Not only will you have fresh cloves at your fingertips, but you will also experience the joy of **growing spices** from scratch. Start your clove cultivation journey today and enjoy the satisfaction of harvesting your own spice 🌿✨