Thuja plants, also known as **arborvitae** or **cedar trees**, are beloved for their lush, green foliage and versatility in landscaping. These evergreen beauties are often used for hedges, privacy screens, or simply as ornamental plants. While purchasing Thuja plants from a nursery is one way to add them to your garden, you can also easily propagate new plants from cuttings. In fact, with a little patience and a simple trick, you can grow Thuja plants from cuttings with **aloe vera gel** to speed up the rooting process and increase the chances of success.
If you’re looking to grow Thuja plants from cuttings and want to know how to do it with minimal fuss, you’re in the right place. Aloe vera gel is a powerful rooting agent that can improve your success rate significantly. In this article, we’ll walk you through the step-by-step process of propagating Thuja plants from cuttings with aloe vera gel, ensuring you have the best possible results.
### Why Propagate Thuja Plants?
Before we get into the how-to, let’s explore the benefits of propagating Thuja plants from cuttings and why it’s worth your time and effort:
1. **Cost-Effective**: Propagating Thuja plants from cuttings allows you to grow many plants from a single mature tree, saving you money on nursery purchases.
2. **Customization**: You can propagate your favorite Thuja varieties and control the shape, size, and density of the plants.
3. **Fun and Rewarding**: Watching a cutting grow into a full, healthy plant is an incredibly rewarding process, and it allows you to share plants with others.
4. **Ideal for Large Areas**: If you need multiple Thuja plants for hedging or screening, propagating from cuttings is a practical and efficient way to create a large number of plants quickly.
Now that we understand why propagation is a great idea, let’s dive into the process of growing Thuja plants from cuttings using aloe vera gel.
### The Power of Aloe Vera Gel in Propagation
Aloe vera gel has long been used in gardening for its amazing ability to promote root growth in plant cuttings. The gel contains **auxins**, which are plant hormones that stimulate root development, helping cuttings form healthy roots more quickly. Aloe vera is also known for its **antiseptic** and **antimicrobial properties**, which protect the cutting from pathogens and prevent rot.
Why aloe vera gel works wonders for propagation:
– **Promotes Faster Rooting**: Aloe vera gel contains compounds that accelerate the formation of roots, allowing the cutting to establish itself more rapidly.
– **Protects from Pathogens**: Aloe vera acts as a natural antiseptic, protecting cuttings from bacterial and fungal infections that could inhibit their growth.
– **Hydrates the Cutting**: Aloe vera’s natural moisture-retaining properties help prevent the cutting from drying out, which is critical during the early stages of rooting.
When used as a rooting agent, aloe vera gel can significantly increase the chances of successful rooting and help your Thuja cuttings grow into strong, healthy plants.
### Materials Needed for Propagating Thuja Plants with Aloe Vera Gel

Before we begin propagating your Thuja plants, let’s gather the materials you’ll need for the process:
– **Fresh Thuja Cuttings**: Healthy 4-6 inch cuttings from a mature Thuja plant.
– **Aloe Vera Gel**: Fresh aloe vera gel from a plant or store-bought aloe vera gel.
– **Small Pots**: Pots or containers with drainage holes, suitable for starting your cuttings.
– **Well-Draining Potting Mix**: A lightweight, well-draining potting mix designed for rooting plants.
– **Pruning Shears**: A clean, sharp pair of pruning shears for cutting the branches.
– **Plastic Bag or Humidity Dome (Optional)**: To maintain moisture around the cutting.
– **Watering Can**: To keep the soil moist.
### Step-by-Step Guide to Propagating Thuja Plants with Aloe Vera Gel
Now that you have everything you need, let’s dive into the step-by-step process of propagating Thuja plants from cuttings using aloe vera gel.
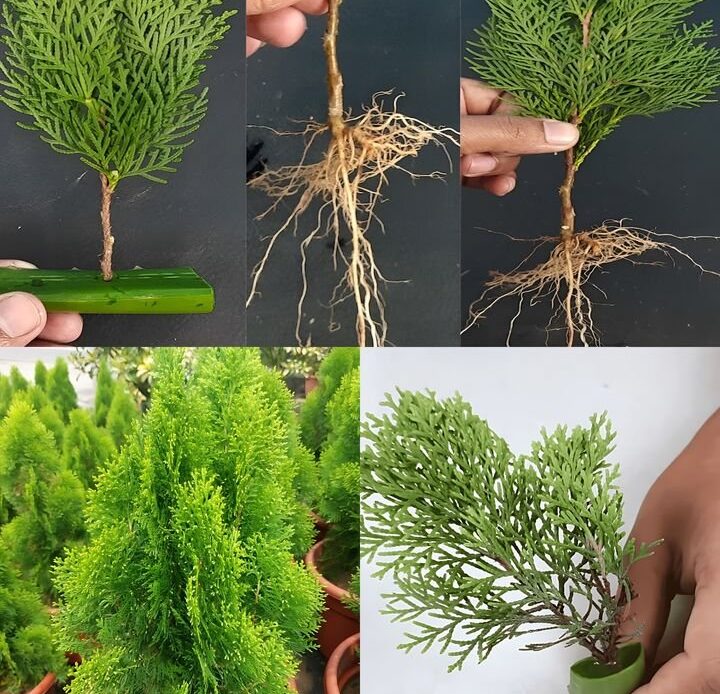
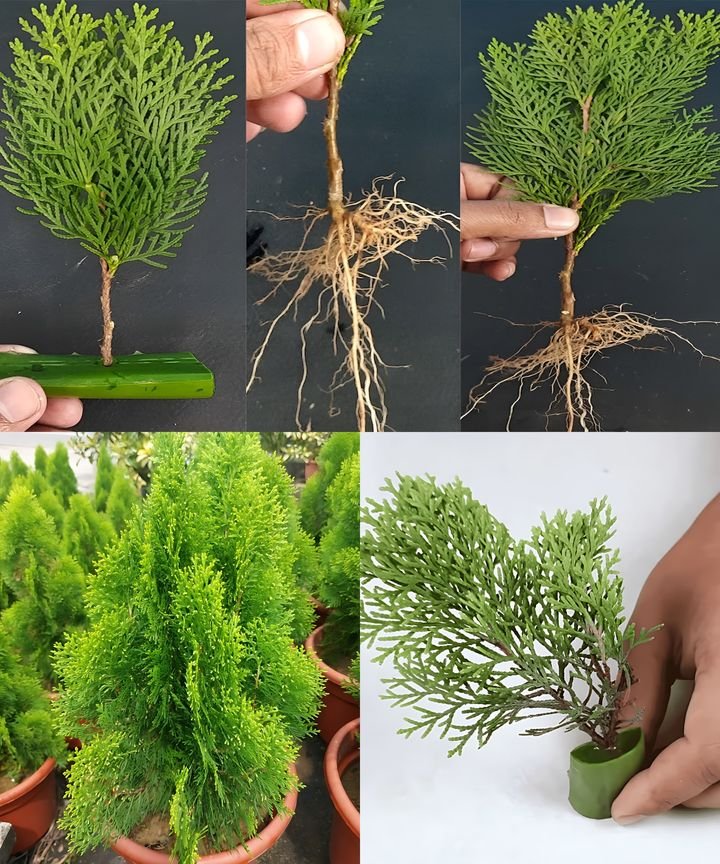
#### Step 1: Prepare the Thuja Cuttings
The first step in the propagation process is to prepare your **Thuja cuttings**. Choose healthy, semi-hardwood branches that are not too young or too old. A semi-hardwood cutting is ideal because it is mature enough to root effectively but still flexible enough to establish roots.
– **Select Healthy Cuttings**: Take 4-6 inch cuttings from the current year’s growth. Choose a stem that’s free of disease or damage.
– **Make the Cut**: Use your pruning shears to make a clean cut just below a **leaf node** (the area where leaves grow). Make sure the cut is straight to avoid any damage to the cutting.
– **Remove Lower Leaves**: Strip off the lower leaves from the cutting, leaving just a few at the top. This reduces moisture loss and prevents the lower portion of the cutting from rotting.
#### Step 2: Apply Aloe Vera Gel
Now that your cuttings are prepared, it’s time to use the **aloe vera gel** to encourage rapid rooting.
– **Extract Aloe Vera Gel**: If you have a fresh aloe vera plant, cut off a small leaf and extract the gel. If using store-bought aloe vera gel, make sure it’s 100% pure and free from additives.
– **Coat the Cutting**: Dip the cut end of each Thuja cutting in the aloe vera gel, making sure it’s well-coated. The gel will help seal the cutting and promote root growth.
**Why Aloe Vera?**
By using aloe vera, you’re ensuring that the cutting has a better chance of surviving and rooting, as it encourages root development and protects the cutting from diseases.
#### Step 3: Plant the Cuttings in Small Pots
Once you’ve dipped the cuttings in aloe vera gel, it’s time to plant them.
– **Prepare the Potting Mix**: Fill small pots with a **well-draining potting mix**. You can use a mix designed for rooting or make your own by combining peat, perlite, and sand.
– **Insert the Cutting**: Gently insert the cutting into the soil, burying the cut end in the mix. Press the soil around the cutting gently to secure it in place. Ensure that the leaf nodes are buried in the soil to facilitate root growth.
– **Water the Cutting**: Lightly water the potting mix to ensure it is moist but not waterlogged. Overwatering can cause the cutting to rot.
#### Step 4: Create a Humid Environment
To encourage root growth, it’s essential to create a humid environment around the cutting. This helps the cutting stay hydrated and promotes faster rooting.
– **Cover with a Plastic Bag or Humidity Dome**: You can use a clear plastic bag or a humidity dome to cover the pot and trap moisture. This creates a mini greenhouse effect that encourages root development.
– **Ventilation**: If using a plastic bag, ensure that there’s some ventilation to allow airflow, which prevents mold and mildew growth.
#### Step 5: Monitor Growth and Watering
During the rooting process, it’s important to monitor the moisture levels and check for root development.
– **Check for Roots**: After about 4-6 weeks, gently tug on the cutting to see if it has developed roots. If you feel resistance, that’s a good sign that roots have formed.
– **Water as Needed**: Keep the soil consistently moist, but avoid soaking it. Water the cutting whenever the top inch of the soil feels dry.
#### Step 6: Transplant the Cuttings
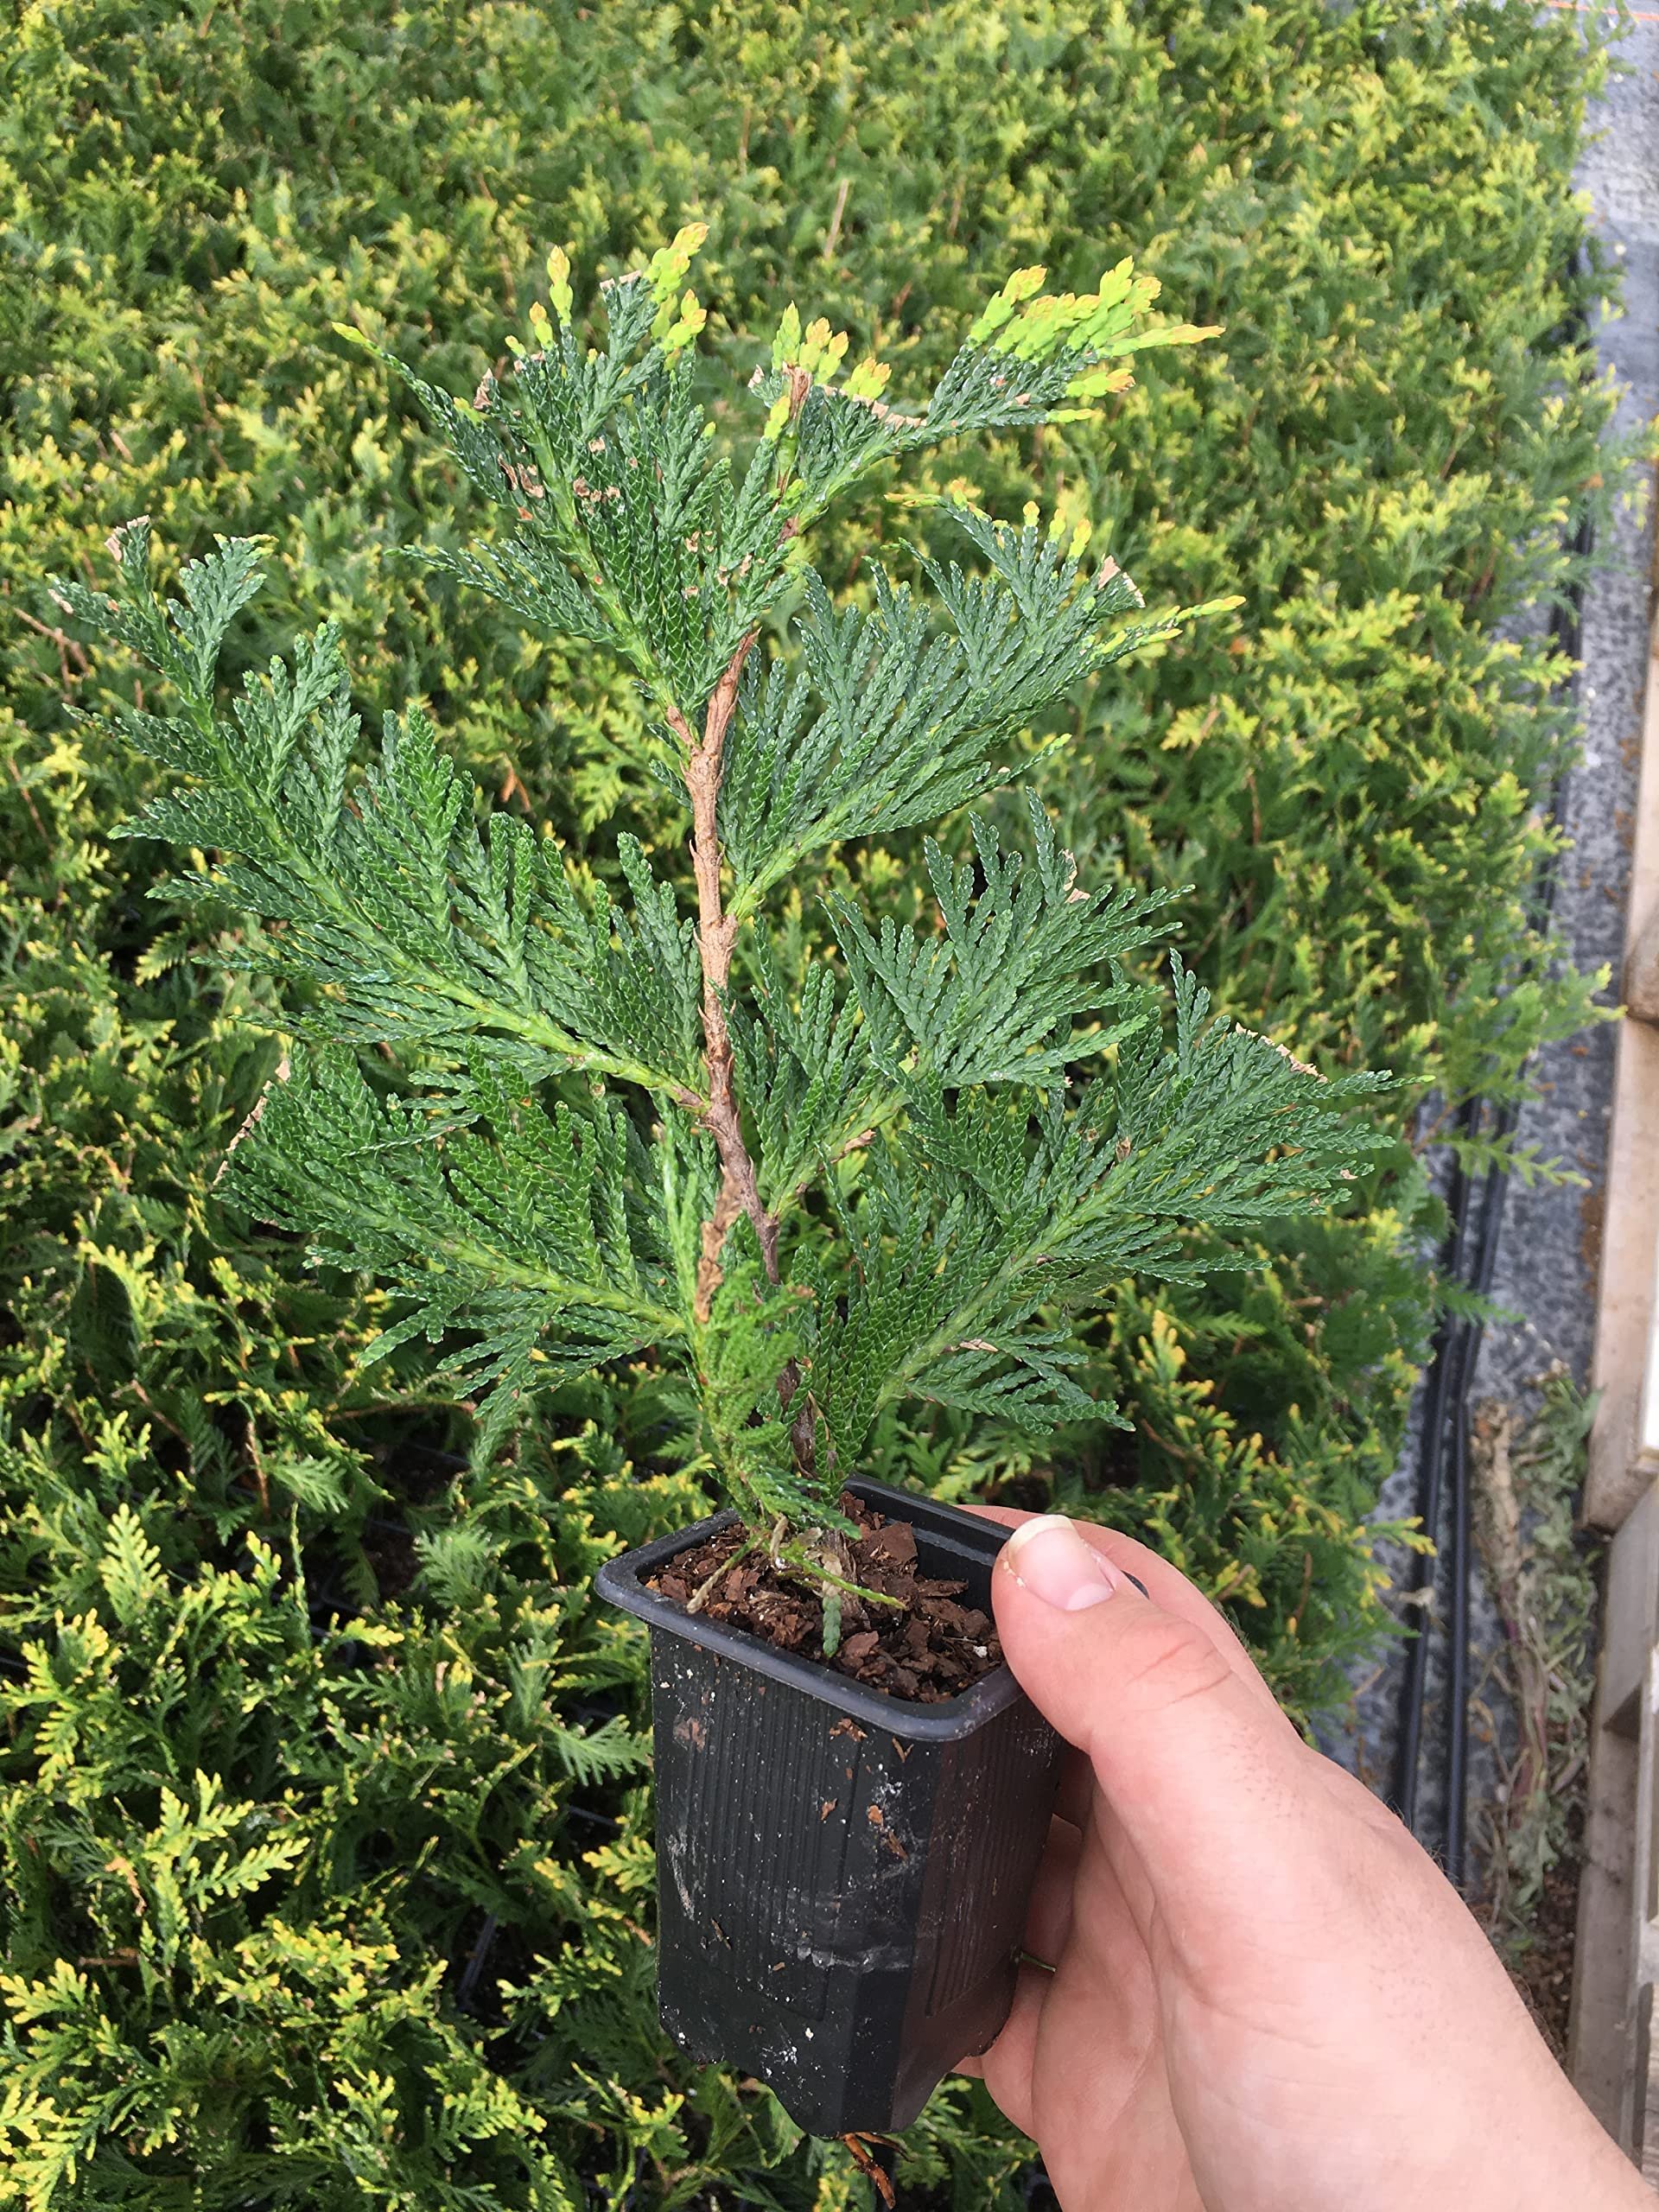
Once the cuttings have developed strong roots and some new growth, it’s time to transplant them into larger pots or into the garden.
– **Larger Pots**: If you’re growing your Thuja plants in pots, move them to a larger container with fresh, well-draining soil. Make sure the pot is big enough to accommodate the growing roots.
– **Garden Transplanting**: If you’re planting the cuttings directly in the garden, choose a spot with well-drained soil and plenty of sunlight. Thuja plants prefer full sun but can tolerate some shade.
#### Step 7: Ongoing Care for Your New Thuja Plants
Now that your Thuja cuttings have successfully rooted and been transplanted, it’s important to continue providing care to ensure healthy growth.
– **Watering**: Keep the soil consistently moist, especially during dry periods. Young plants require more frequent watering, but avoid waterlogging.
– **Sunlight**: Place the plants in an area that receives plenty of sunlight. Thuja plants thrive in full sun but can tolerate partial shade.
– **Fertilization**: Apply a balanced fertilizer every few weeks during the growing season to encourage strong, healthy growth.
– **Pest Control**: Keep an eye out for pests such as aphids or spider mites. If you notice any, treat the plants with a natural insecticide.
### Tips for Success
– **Fresh Cuttings**: Always use fresh, healthy cuttings for the best chance of success. Old or damaged cuttings may not root properly.
– **Be Patient**: Rooting can take several weeks, so don’t get discouraged if you don’t see results right away.
– **Temperature**: Maintain a warm environment (65-75°F / 18-24°C) for optimal rooting.
– **Use Aloe Vera Gel**: Aloe vera gel is a natural rooting agent that speeds up the rooting process and prevents infection.
### Conclusion: Start Growing Your Thuja Plants Today
Propagating Thuja plants from cuttings is a rewarding and cost-effective way to grow your garden. By using the simple technique of applying **aloe vera gel** to encourage root growth, you can increase your chances of success and grow strong, healthy plants. With the right care and patience, you’ll soon have beautiful Thuja trees to add to your landscape.
Whether you’re looking to create a privacy hedge, add some greenery to your garden, or share your plants with friends and family, propagating Thuja from cuttings is an easy and enjoyable process. So, grab your **Thuja cuttings**, **aloe vera gel**, and start propagating today