If you’ve ever marveled at the majestic pine trees swaying in the breeze and thought about having your own miniature forest, you’re in luck Growing pine trees from pine cones is not only a fascinating gardening project but also an eco-friendly and rewarding endeavor. The process may seem daunting at first, but with a little patience, some basic supplies, and a bit of guidance, you can transform those humble pine cones into towering pine trees.
In this step-by-step guide, we’ll take you through the entire process of growing pine trees from pine cones, including how to properly select, prepare, and plant the seeds, as well as how to care for your growing trees. You’ll also learn how to transplant your seedlings and maintain your trees for long-term success. So, let’s dive in and start growing your own **pine forest** at home
### Why Grow Pine Trees from Pine Cones?
Before jumping into the details of how to grow pine trees from pine cones, you may be wondering why you should even attempt this process. Here are some compelling reasons to grow pine trees from pine cones:
1. **Eco-Friendly Gardening**: Growing pine trees from pine cones is an environmentally sustainable project. You’re reusing nature’s seeds to create something beautiful, which helps reduce waste and adds greenery to your surroundings.
2. **Create Your Own Forest**: Pine trees can live for hundreds of years and grow into towering, majestic trees. By growing pine trees from pine cones, you can create a mini forest right in your own yard or garden.
3. **Educational and Fun**: Growing pine trees from seeds is a great way to teach kids and young gardeners about the life cycle of trees and the importance of nature. It’s also a fun and educational process for anyone interested in nature.
4. **Add Beauty and Privacy**: Pine trees can provide natural beauty and serve as **privacy screens** or windbreaks in your garden. With proper care, your pine trees will grow tall and healthy, creating a lovely green space.
### Materials You’ll Need to Grow Pine Trees from Pine Cones
To start your pine tree-growing journey, you’ll need a few basic materials. Here’s a list of what you’ll need to get started:
1. **Healthy Pine Cones**: Choose **fully developed, mature pine cones** from a healthy pine tree. These cones should be dry and firm. Avoid cones that are damaged or moldy.
2. **Sharp Scissors or Pruning Shears**: To cut open the pine cones and extract the seeds.
3. **Water**: You’ll need water to soak the seeds and promote germination.
4. **Moist Medium**: A moist medium (like a damp paper towel) to store the seeds for stratification.
5. **Small Pots**: Use small pots or seed trays with drainage holes for planting the seeds.
6. **Well-Draining Potting Mix**: A well-draining **potting mix** is crucial for healthy root growth.
7. **Clear Plastic Bags or Plastic Domes**: To create a humid environment for germination.
8. **Watering Can**: To water the seeds and soil gently.
9. **Sunny Spot**: A sunny spot with **indirect sunlight** is ideal for growing your pine tree seedlings.
Now that you’ve gathered your materials, let’s get started with the process of growing pine trees from pine cones
### Step 1: Selecting Pine Cones 🌲
The first step in growing pine trees from pine cones is selecting healthy cones. Not all pine cones are suitable for propagation, so it’s important to choose the right ones.
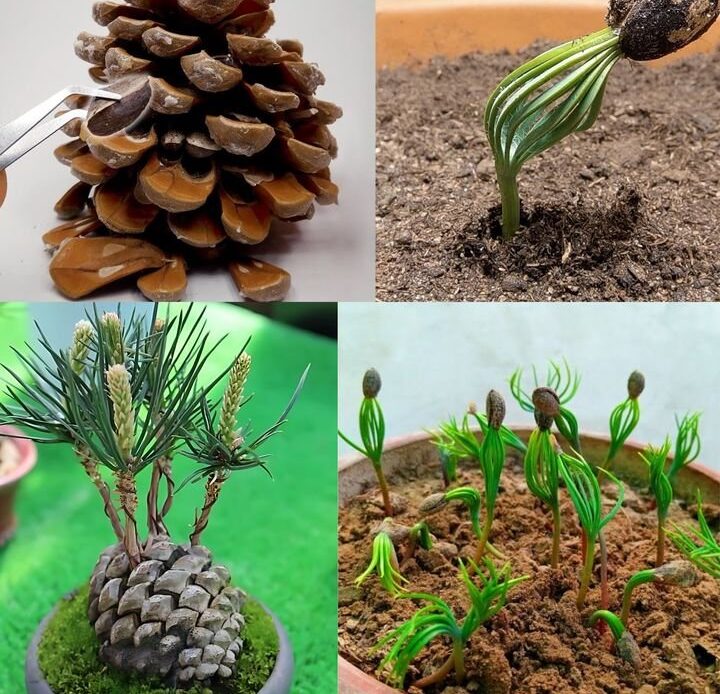
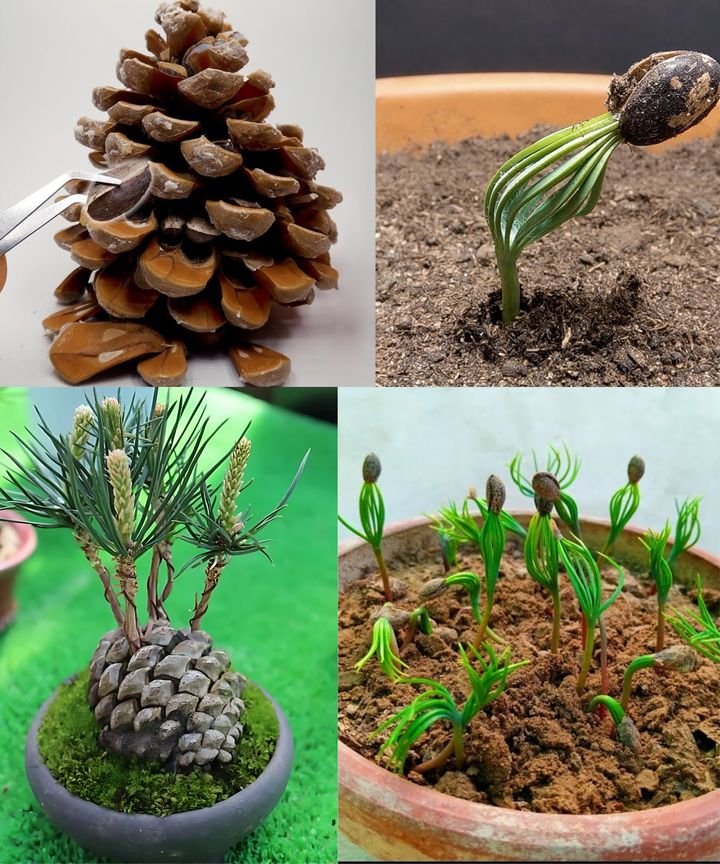
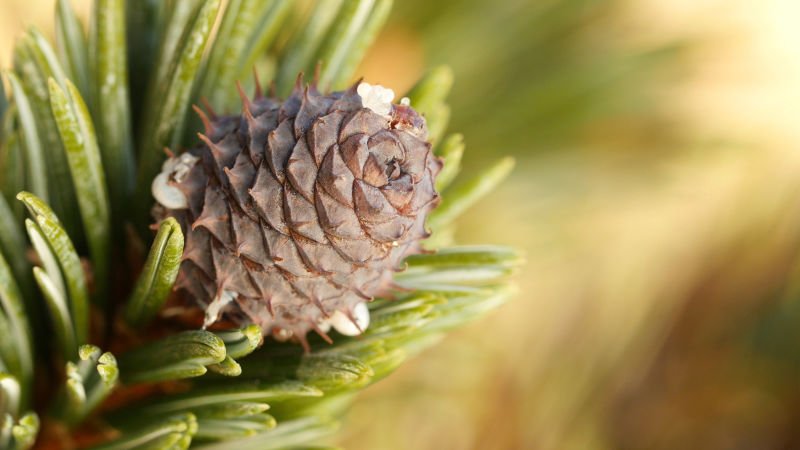
1. **Choose Mature Pine Cones**: Mature pine cones are firm and slightly open, indicating they’ve released their seeds. Look for cones that are healthy, with no visible mold, cracks, or damage. Avoid collecting cones that have already fallen and are too dried out.
2. **Select the Right Species**: There are many species of pine trees, and each one produces different types of cones. Make sure to select pine cones from a species of pine tree that is native to your area or suited for your climate.
3. **Gather Enough Pine Cones**: Collect several cones from healthy trees to increase the chances of success. Some cones may not contain viable seeds, so having multiple cones will give you a better chance at germination.
### Step 2: Preparing Pine Cones for Seed Extraction 🌲
Once you’ve selected your pine cones, it’s time to prepare them for seed extraction. Follow these steps to extract the seeds:
1. **Dry the Pine Cones**: Place the collected pine cones in a warm, dry location for a few days to allow them to fully open up. This will release the seeds inside.
2. **Extract the Seeds**: Once the cones are open, carefully remove the seeds from the pine cone. You can use scissors or your hands to break apart the cone and release the seeds. Be gentle to avoid damaging the seeds.
3. **Discard Debris**: After extracting the seeds, discard any debris or leftover cone fragments. You should only be left with the clean seeds.
### Step 3: Treating the Seeds (Stratification) 🌱
Most pine seeds require a period of **cold stratification** before they will germinate. Stratification is a process that mimics winter conditions and helps break the seed’s dormancy.
1. **Soak the Seeds**: Place the extracted pine seeds in a bowl of water and let them soak for **24 to 48 hours**. This will soften the seed coat and prepare the seeds for germination.
2. **Store in a Moist Medium**: After soaking, place the seeds in a **moist medium**, such as a damp paper towel, and store them in the refrigerator. You’ll need to keep the seeds in the fridge for **4 to 6 weeks** to mimic the cold winter conditions. Ensure that the paper towel remains moist but not soaking wet.
### Step 4: Planting the Seeds 🌱
Once the seeds have undergone stratification, they’re ready to be planted. Follow these simple steps to plant your seeds and give them the best chance of growing into healthy pine trees:
1. **Prepare the Pots**: Fill small pots with **well-draining potting mix**. It’s essential to use a mix that drains well, as pine seeds don’t like to sit in waterlogged soil. Consider using a **cactus mix** or **sandy loam**.
2. **Plant the Seeds**: Make small holes in the soil, about **1/4 to 1/2 inch deep**. Place the seeds in the holes and cover them lightly with soil. Make sure the seeds are spaced apart to give them enough room to grow.
3. **Water the Seeds**: Water the soil gently using a watering can or spray bottle. Keep the soil moist, but not soaked, to encourage seedling growth.
### Step 5: Providing the Right Conditions 🌞
For your pine tree seeds to germinate, they need the right environmental conditions. Here’s how to ensure they have the best chance for success:
1. **Sunlight**: Place the pots in a **sunny spot with indirect sunlight**. Pine tree seedlings need plenty of light to germinate, but direct sunlight may be too harsh at this early stage.
2. **Humidity**: To maintain humidity, cover the pots with **clear plastic bags** or **plastic domes**. This will create a mini-greenhouse effect that helps the seeds germinate. Be sure to provide some ventilation to prevent mold growth.
3. **Temperature**: Keep the pots in a warm location with temperatures between **65-75°F (18-24°C)**. Pine trees thrive in these moderate temperatures during the early stages of growth.
### Step 6: Monitoring and Caring for Seedlings 🌱
After a few weeks, your seeds should begin to sprout. At this point, it’s important to monitor and care for the seedlings to ensure healthy growth.
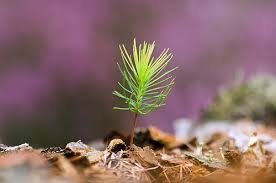
1. **Check for Germination**: Keep an eye on the pots for signs of sprouting. Pine seedlings will appear as small, green shoots emerging from the soil.
2. **Watering**: Keep the soil consistently moist but not soggy. Use a gentle watering can or spray bottle to water the seedlings, ensuring the soil remains moist but not waterlogged.
3. **Provide Light**: As the seedlings grow, make sure they continue to receive sufficient light. If you’re growing indoors, consider using **grow lights** to ensure they get the right amount of exposure.
### Step 7: Transplanting Seedlings 🌳
Once your seedlings have developed true leaves and strong root systems, it’s time to transplant them to larger pots or into the garden.
1. **Choose the Right Location**: If you plan to move your pine seedlings to the garden, choose a **sunny, well-draining location**. Pine trees need full sun to thrive and grow tall.
2. **Transplanting**: Gently remove the seedlings from their pots, being careful not to damage the roots. Plant the seedlings in their new pots or garden beds, ensuring they are spaced far enough apart to allow for future growth.
### Step 8: Ongoing Care for Your Pine Trees 🌳
Once your pine trees are in their permanent spots, it’s time to focus on ongoing care to ensure they continue to grow strong and healthy.
1. **Watering**: Water regularly, especially during dry periods, but avoid overwatering. Pine trees don’t like to sit in waterlogged soil.
2. **Fertilizing**: Apply a **balanced fertilizer** once a year in the spring to provide the trees with the nutrients they need for healthy growth.
3. **Pruning**: Prune your pine trees as needed to remove dead or damaged branches. This will encourage a strong, healthy structure.
### Conclusion: Enjoy Your Pine Trees for Generations 🌲

Growing pine trees from pine cones is an incredibly rewarding project that allows you to witness the entire life cycle of a tree—from seed to towering beauty. With the right materials, patience, and care, you can successfully propagate pine trees and watch them grow into magnificent trees that will stand for generations. So, gather your pine cones, start planting, and enjoy the beauty of your own homegrown pine forest 🌿🌱